

一、 S32V VSDK1.3.0環境架設
下載路徑:
https://www.nxp.com/products/processors-and-microcontrollers/arm-based-processors-and-mcus/s32-automotive-platform/vision-processor-for-front-and-surround-view-camera-machine-learning-and-sensor-fusion-applications:S32V234?tab=Design_Tools_Tab
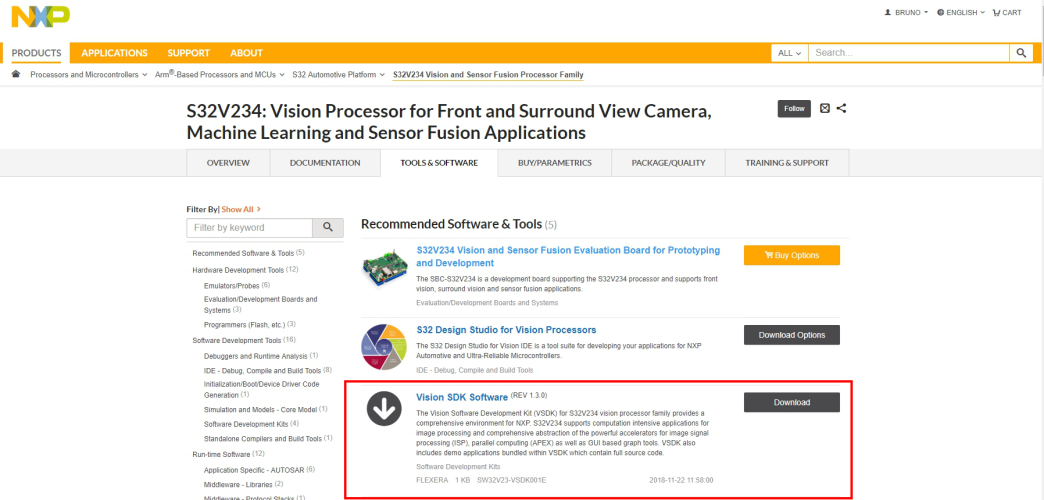
點選
1. 下載 VSDK1.3.0
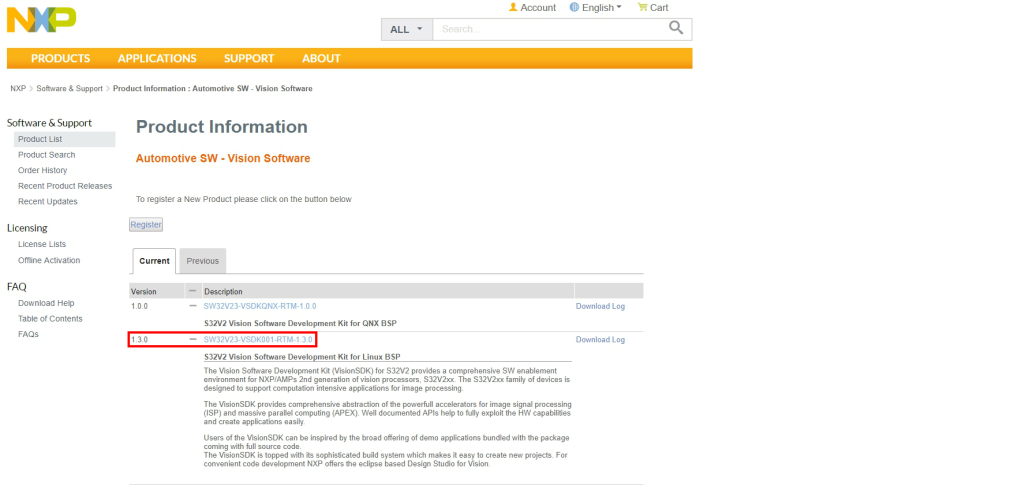
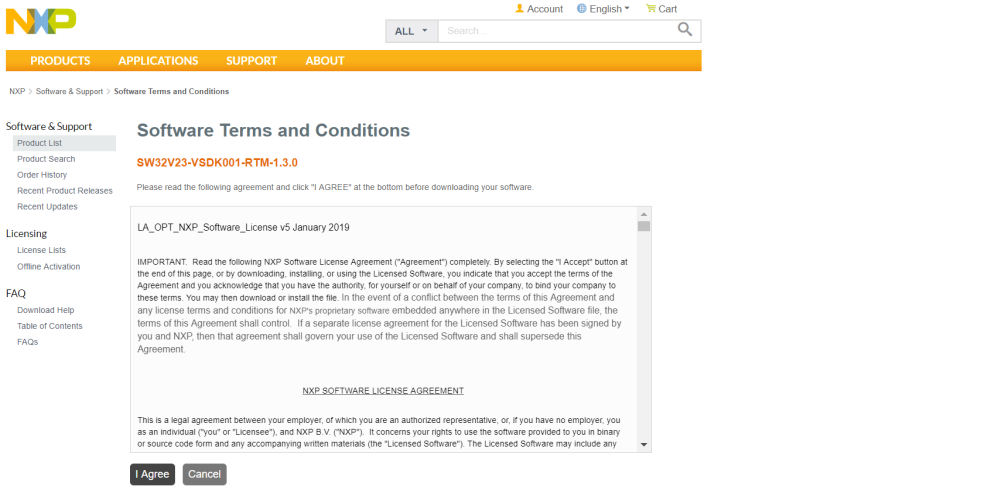
閱讀 “NXP SOFTWARE LICENSE AGREEMENT” 後,點選 “I Agree”
我們選用的是 Linux 版的 VSDK
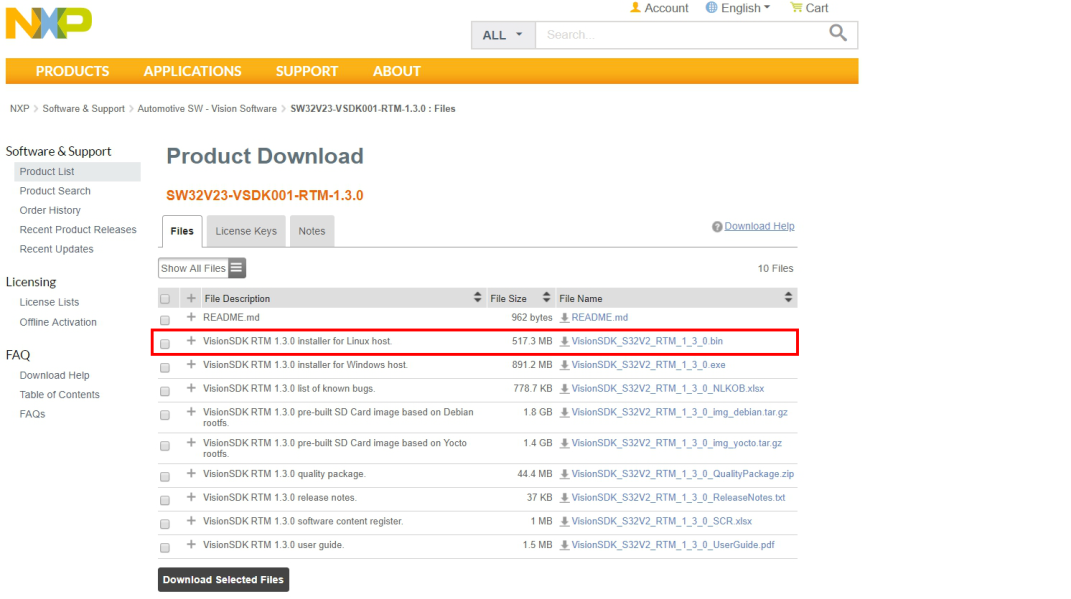
下載檔案為:VisionSDK_S32V2_RTM_1_3_0.bin
2. 安裝 VSDK1.3.0
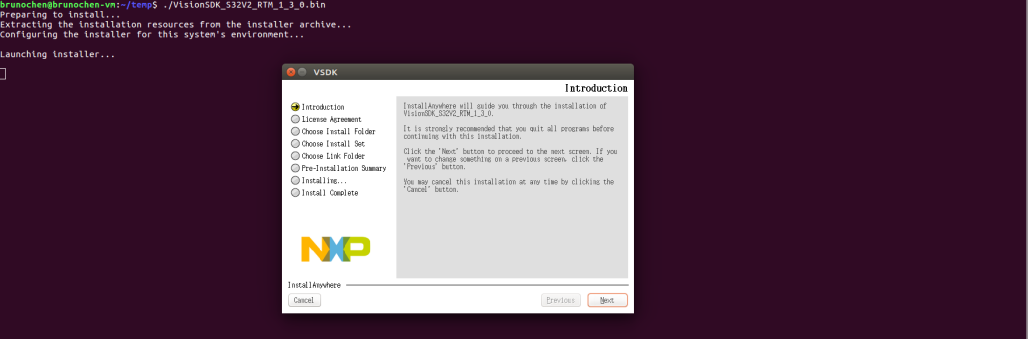
安裝 VSDK1.3.0:
$ ./VisionSDK_S32V2_RTM_1_3_0.bin
點選 “Next”
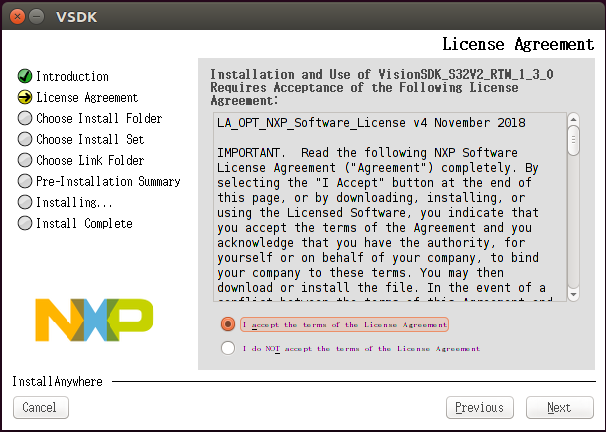
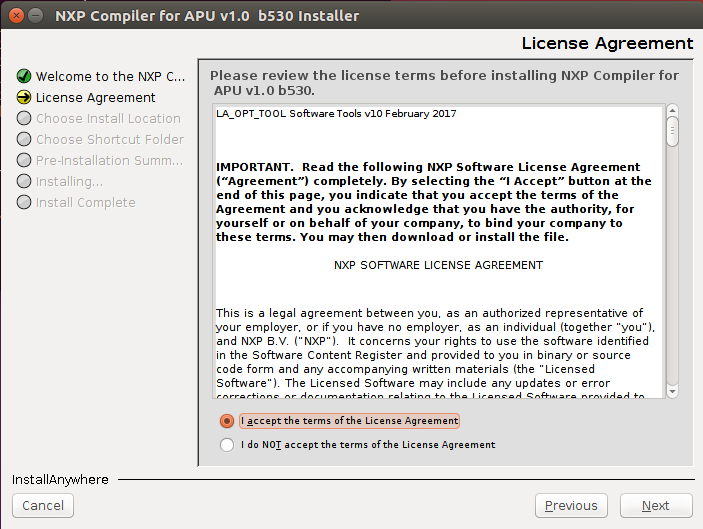
閱讀 “License Agreement”,同意後勾選 “I accept the of the License Agreement”,然後點選 “Next”
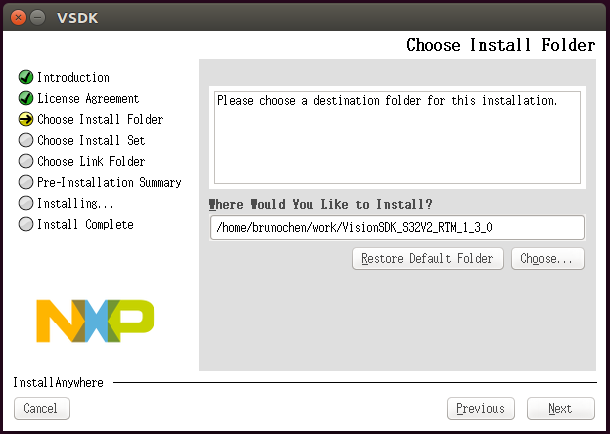
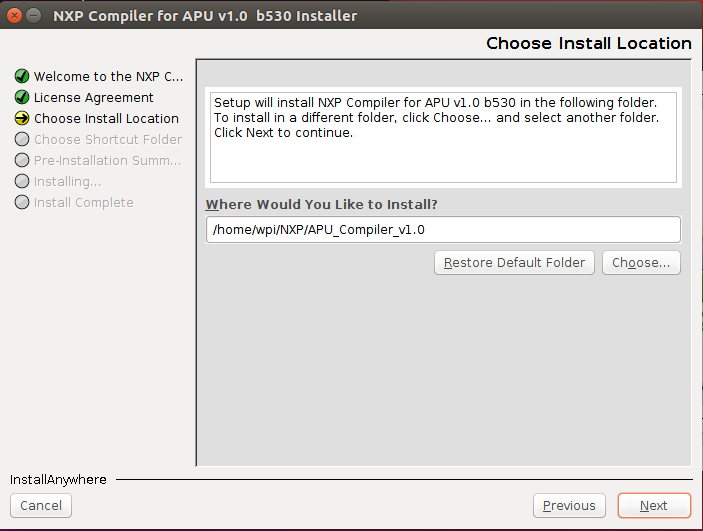
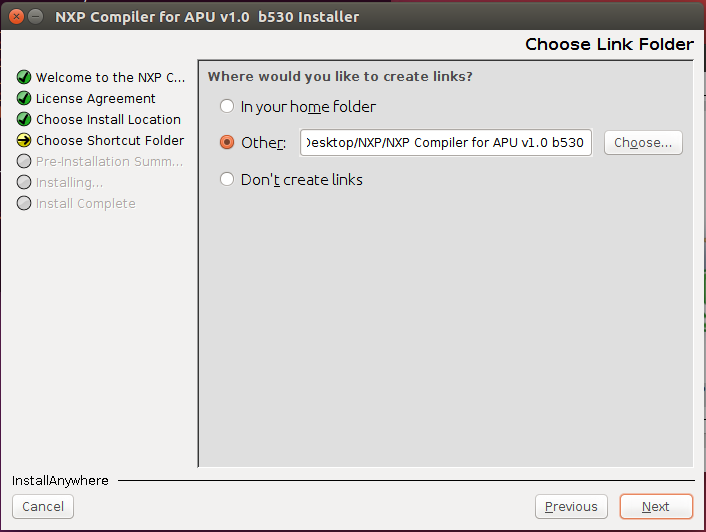
選擇安裝資料夾,然後點選 “Next”
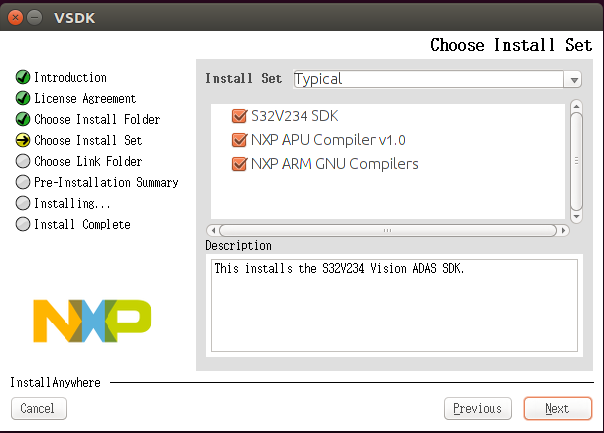
全部安裝,然後點選 “Next”
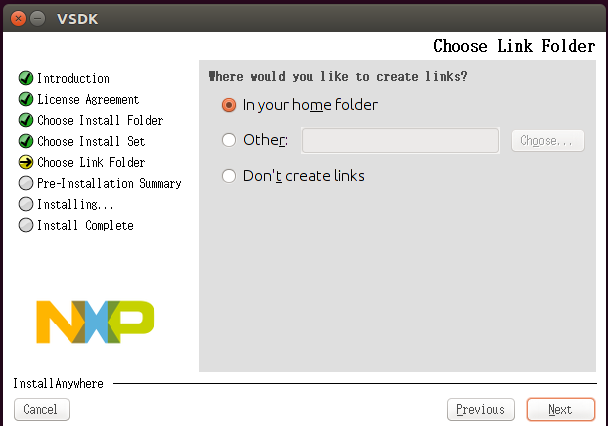
點選 “Next”
選 “Next”
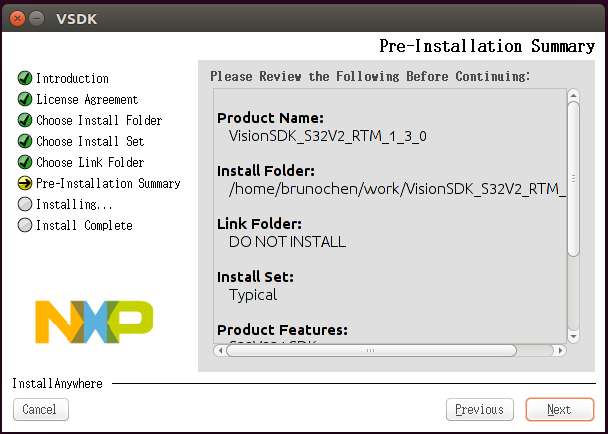
如果沒有 NXP APU Compiler 的 License Keys,請點選網址申請,然後點選 “Install”
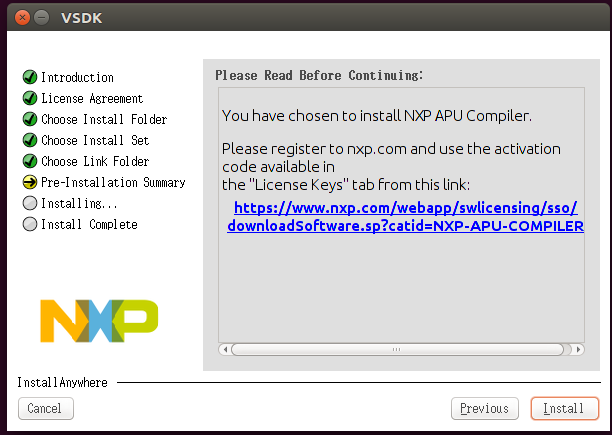
此時,會跳出另一個安裝 NXP Compiler for APU 的視窗,點選 “Next”
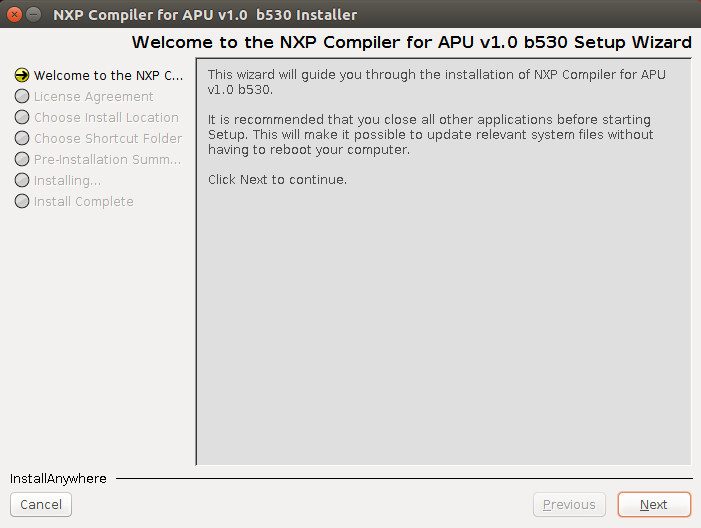
閱讀 “License Agreement”,同意後勾選 “I accept the of the License Agreement”,然後點選 “Next”
選擇安裝路徑,然後點選 “Next”
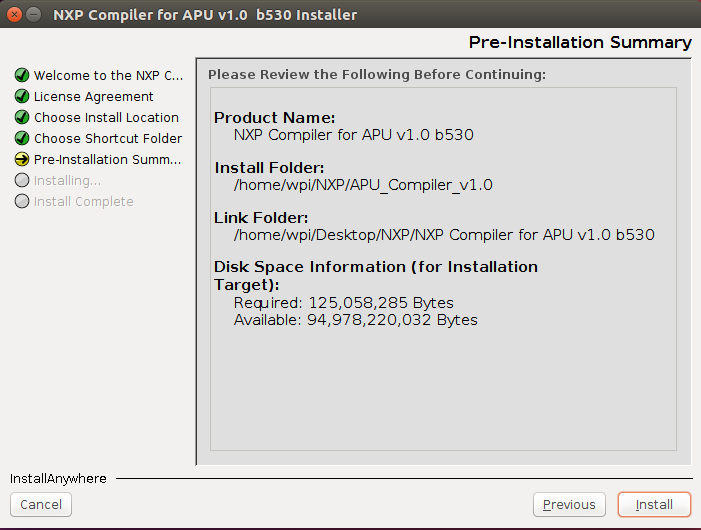
點選 “Next”
點選 “Install”
在 console 視窗輸入 sudo password
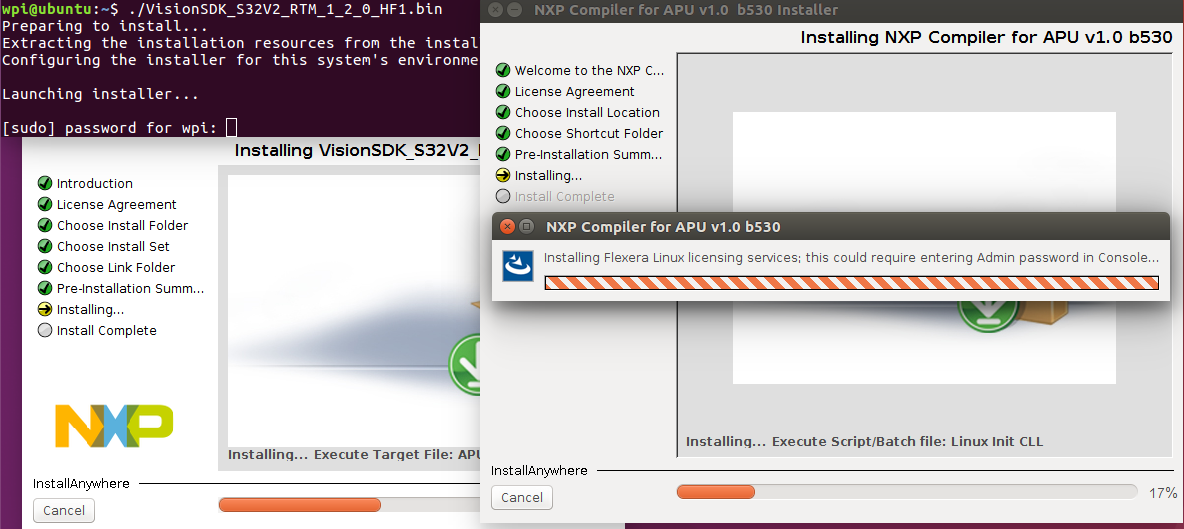
輸入 sudo password 後會持續安裝

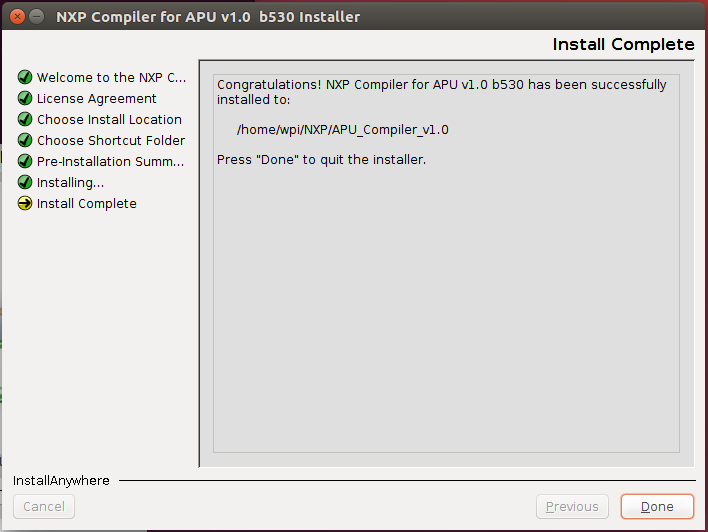
安裝完成 NXP Compiler for APU 後,點選 “Done”
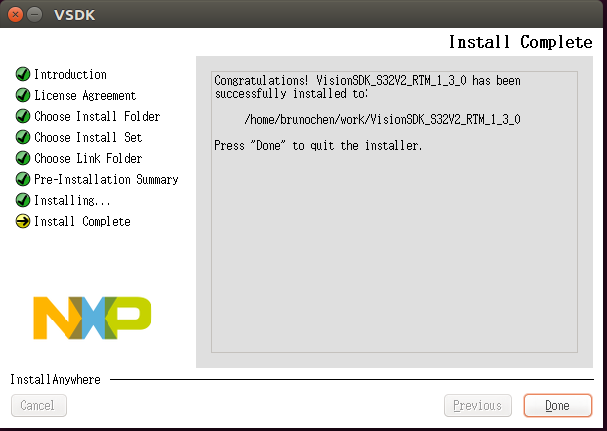
安裝完成 VSDK1.3.0 後,點選 “Done”,即返回 console 視窗
下載路徑:
https://www.nxp.com/products/processors-and-microcontrollers/arm-based-processors-and-mcus/s32-automotive-platform/vision-processor-for-front-and-surround-view-camera-machine-learning-and-sensor-fusion-applications:S32V234?tab=Design_Tools_Tab
點選
1. 下載 VSDK1.3.0
閱讀 “NXP SOFTWARE LICENSE AGREEMENT” 後,點選 “I Agree”
我們選用的是 Linux 版的 VSDK
下載檔案為:VisionSDK_S32V2_RTM_1_3_0.bin
2. 安裝 VSDK1.3.0
安裝 VSDK1.3.0:
$ ./VisionSDK_S32V2_RTM_1_3_0.bin
點選 “Next”
閱讀 “License Agreement”,同意後勾選 “I accept the of the License Agreement”,然後點選 “Next”
選擇安裝資料夾,然後點選 “Next”
全部安裝,然後點選 “Next”
點選 “Next”
選 “Next”
如果沒有 NXP APU Compiler 的 License Keys,請點選網址申請,然後點選 “Install”
此時,會跳出另一個安裝 NXP Compiler for APU 的視窗,點選 “Next”
閱讀 “License Agreement”,同意後勾選 “I accept the of the License Agreement”,然後點選 “Next”
選擇安裝路徑,然後點選 “Next”
點選 “Next”
點選 “Install”
在 console 視窗輸入 sudo password
輸入 sudo password 後會持續安裝
安裝完成 NXP Compiler for APU 後,點選 “Done”
安裝完成 VSDK1.3.0 後,點選 “Done”,即返回 console 視窗
3. 編譯 ffmpeg in VSDK (編譯 OpenCV 會用到)
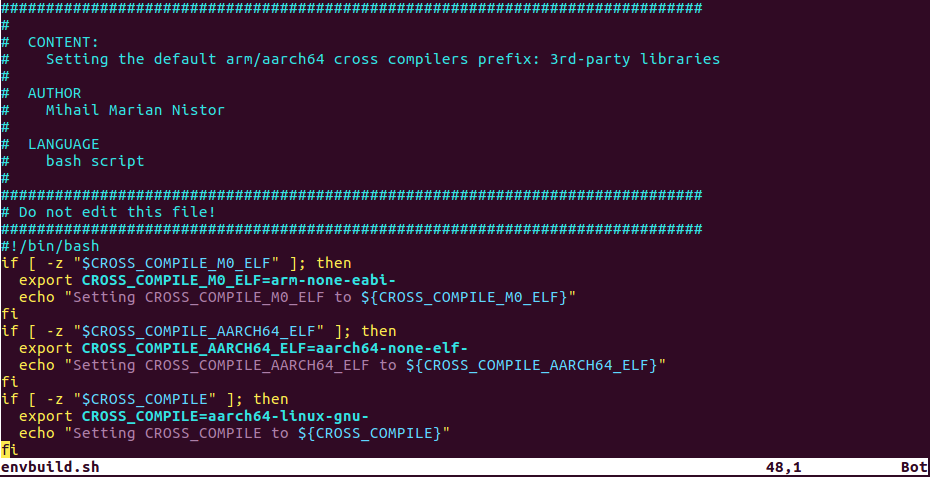
設定編譯環境變數:
$ cd /s32v234_sdk
$ ./envbuild.sh
$ export PATH=/compilers/gcc-6.3.1-linaro-Xarmv8-linux/i686-linux/bin:$PATH


下載 ffmpeg:
$ cd /s32v234_sdk/3rdparty/ffmpeg
$ ./getFFmpeg.sh
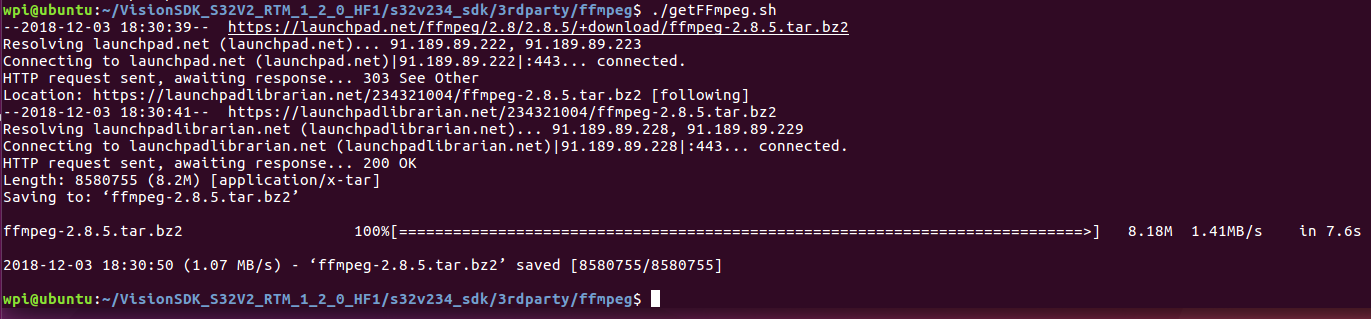

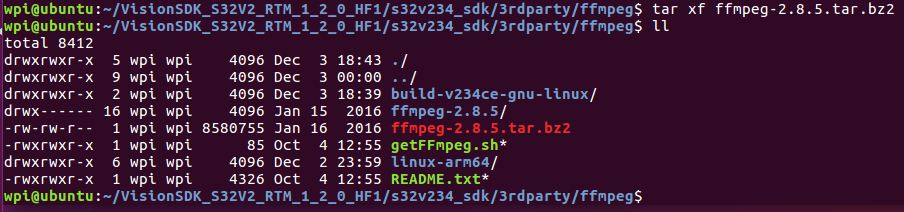
解壓縮:
$ tar xf ffmpeg-2.8.5.tar.bz2
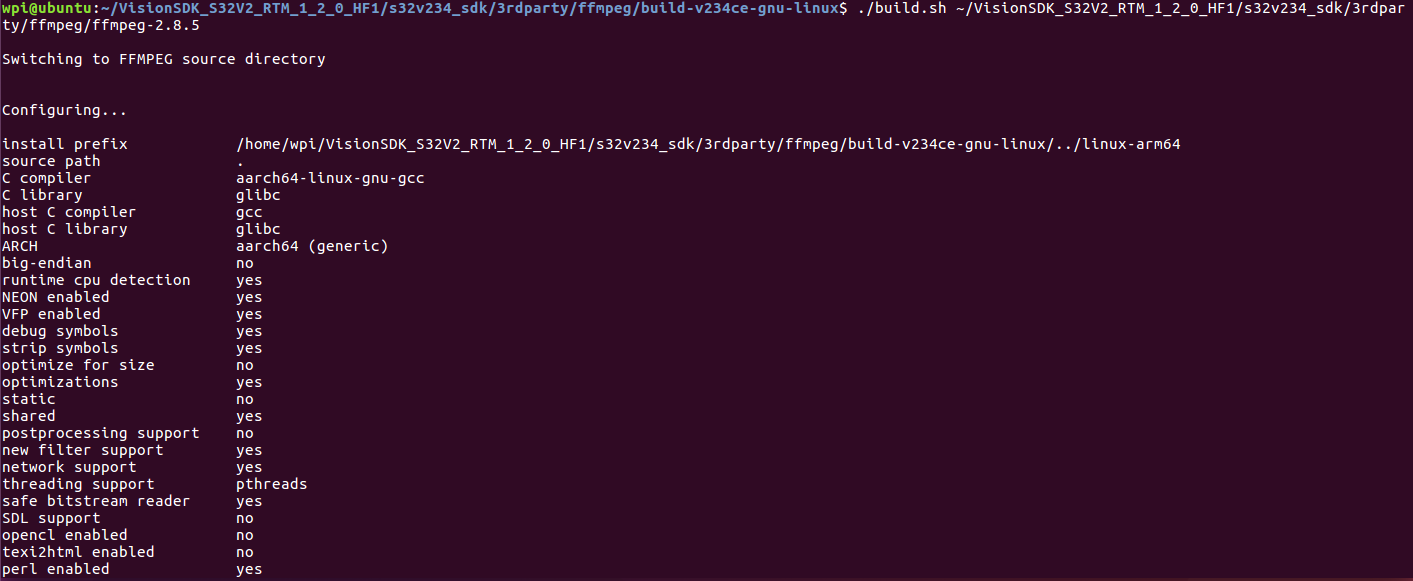
編譯 ffmpeg:
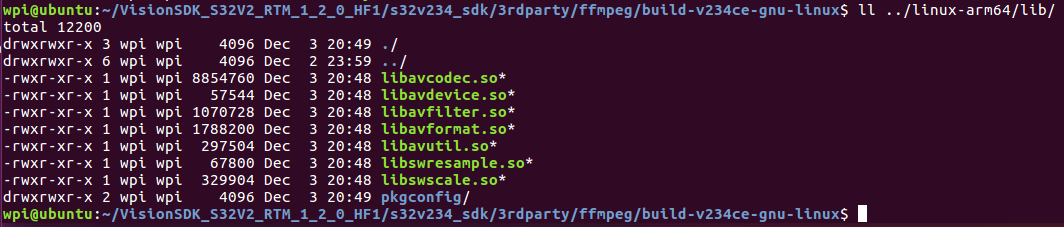
$ cd /s32v234_sdk/3rdparty/ffmpeg/build-v234ce-gnu-linux
$./build.sh /s32v234_sdk/3rdparty/ffmpeg/ffmpeg-2.8.5
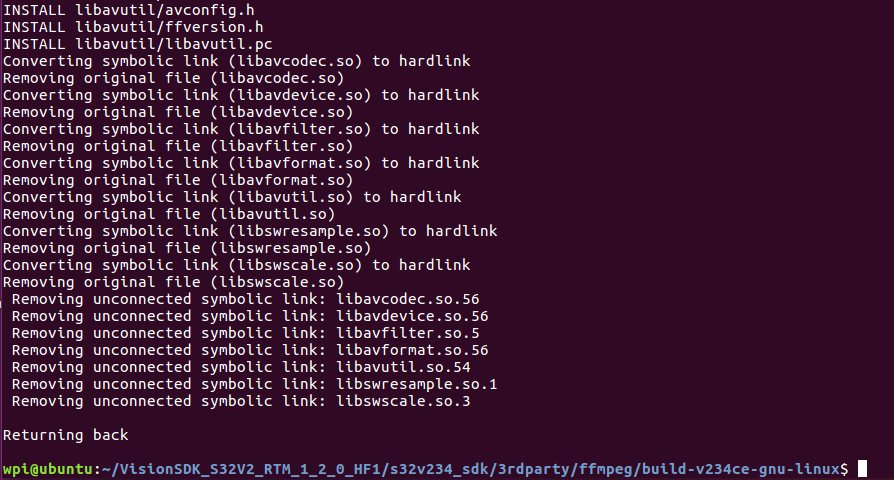
Copy .so file to filesystem “/lib”:
4. 編譯 OpenCV
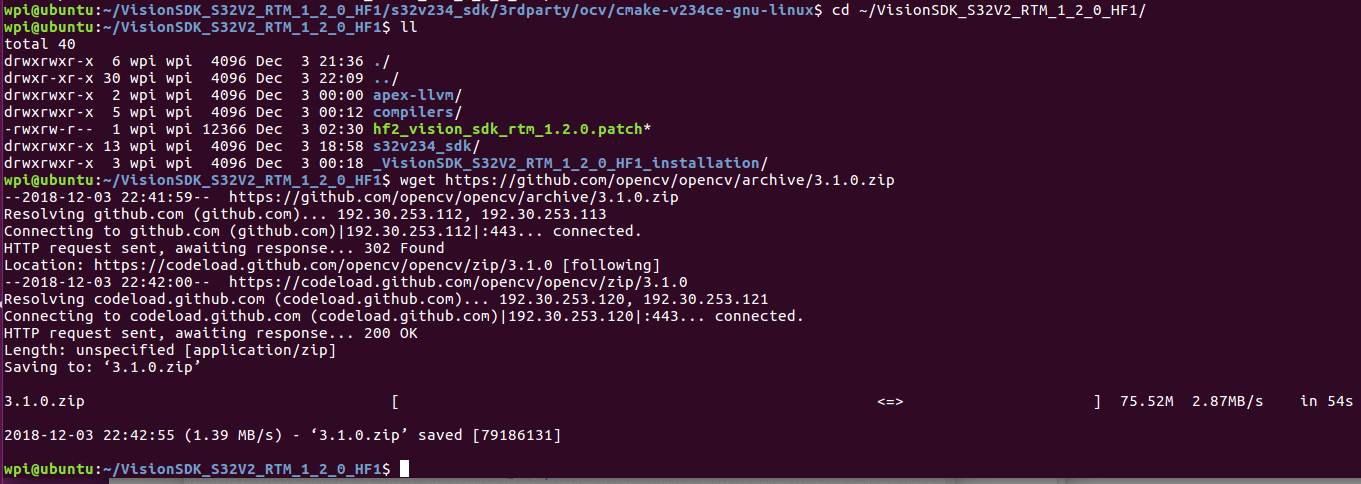
下載 OpenCV:我們使用的範例是 OpenCV 3.1.0
$ cd
$ wget https://github.com/opencv/opencv/archive/3.1.0.zip
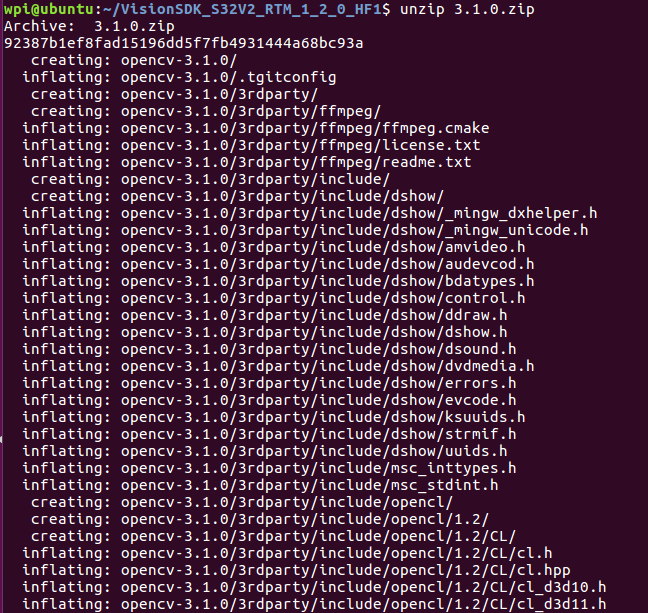
解壓縮:
$ unzip 3.1.0.zip
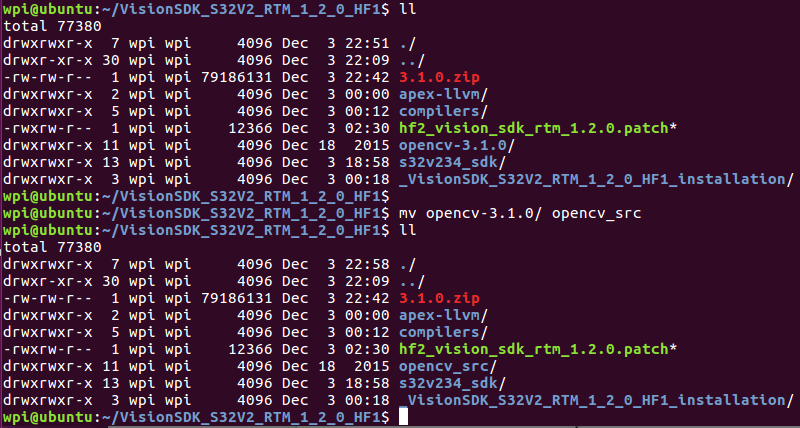
更改 OpenCV folder name:
$ mv opencv-3.1.0 opencv_src
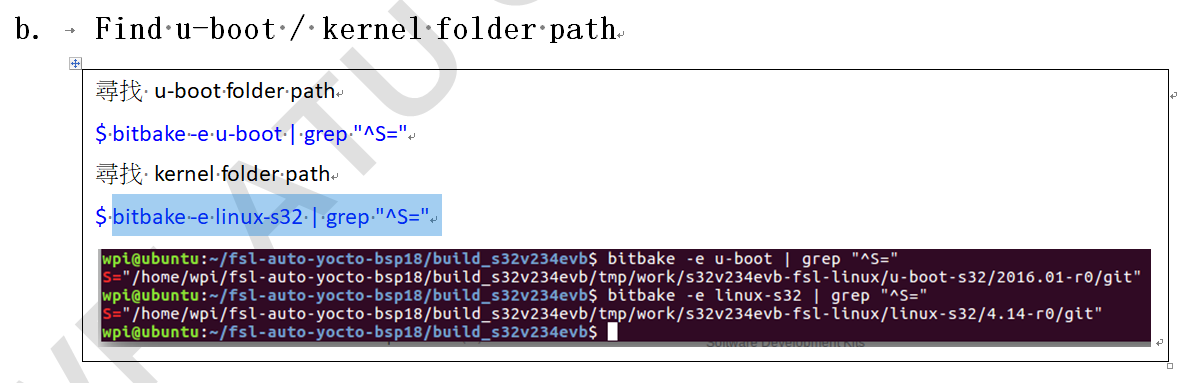
設定 LINUX_S32V234_DIR 變數:一.7.b 章節有說明 kernel path 取得的方法
$ export LINUX_S32V234_DIR= /build_s32v234evb/tmp/work/s32v234evb-fsl-linux/linux-s32/4.14-r0/git

編譯 OpenCV:
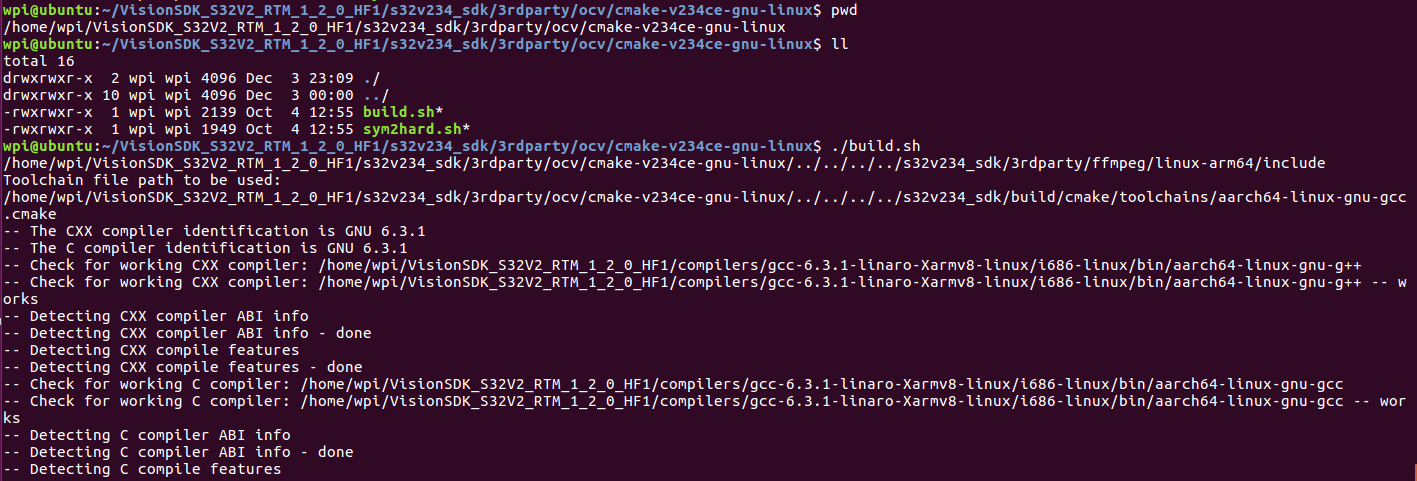
$ cd /s32v234_sdk/3rdparty/ocv/cmake-v234ce-gnu-linux
$ ./build.sh
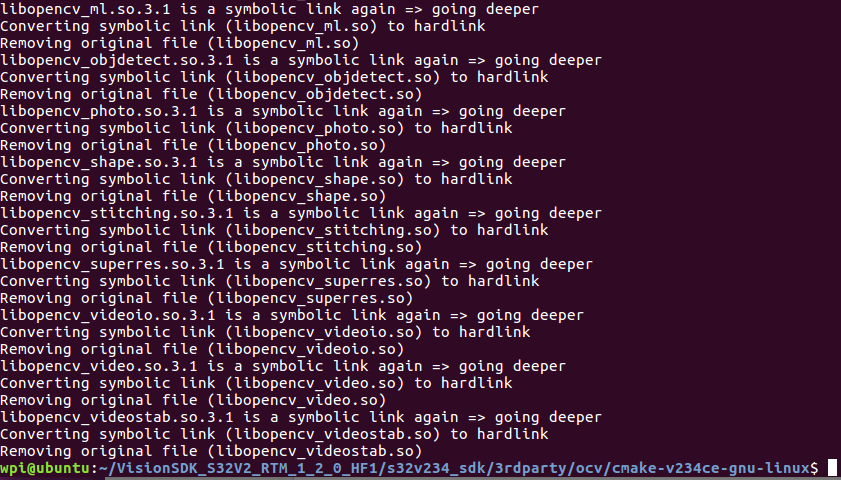
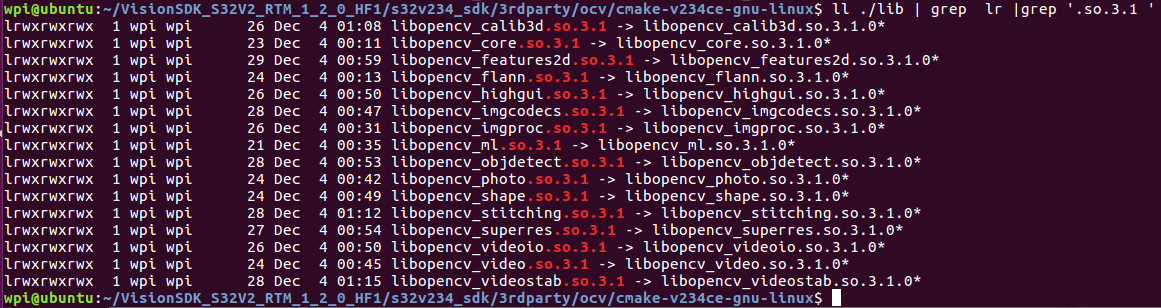
Copy .so.3.1 file to filesystem “/lib”:
5. 編譯 Kernel Module
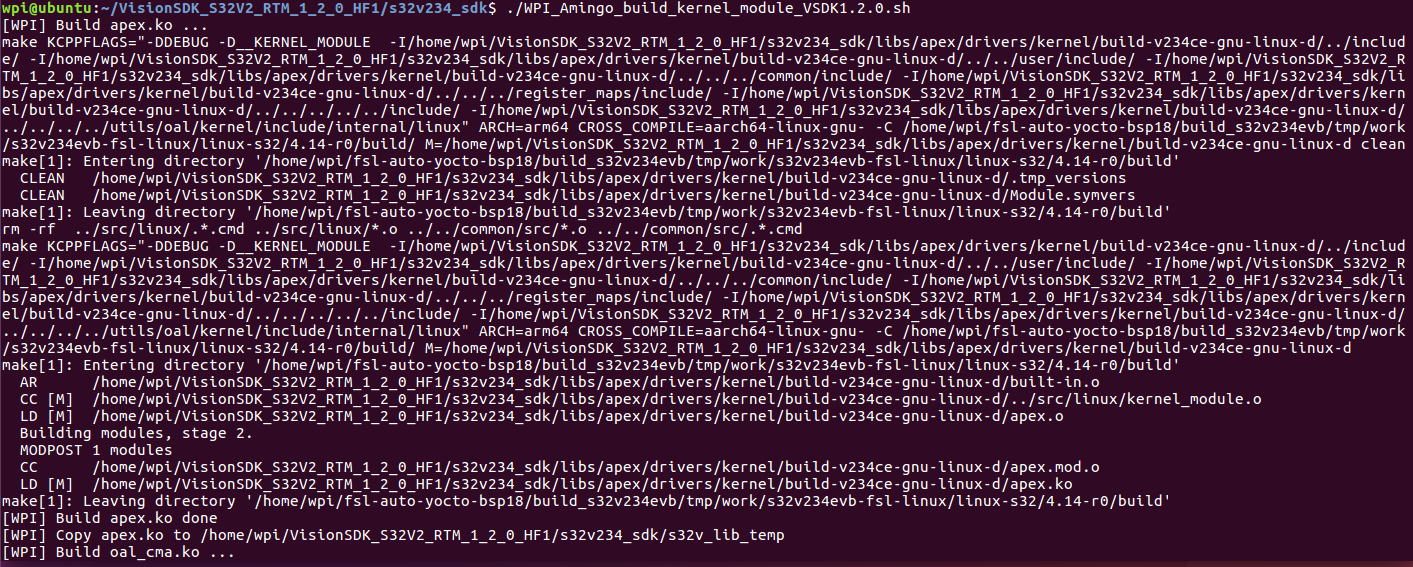
編譯 kernel module:請執行下方 .sh file
"WPI_Amingo_build_kernel_module_VSDK1.2.0.sh"
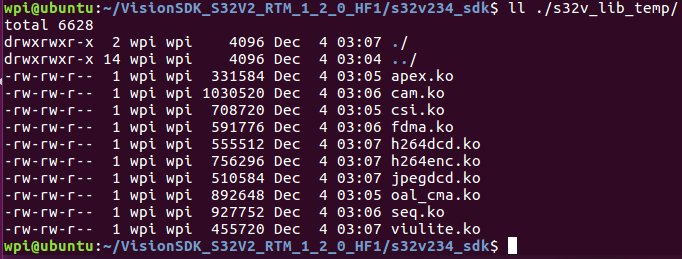
.so file path:
ll /s32v234_sdk/s32v_lib_temp
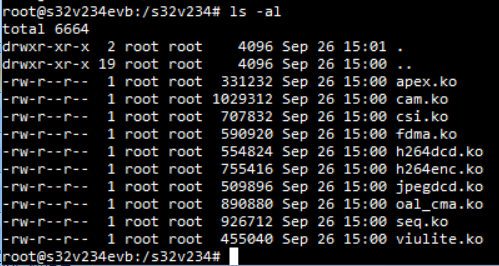
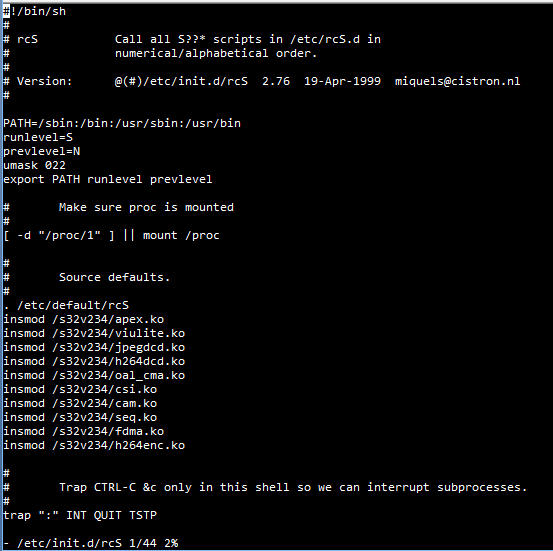
Copy all files to filesystem “/s32v234”:
評論