上次讲到“QUALCOMM QCC蓝牙系列量产必备:PSkey 在应用中的存储与访问 ”,本次讲的是Application如何存储数据到 PSK 里
QCC512x 与QCC302X基于ADK6.X 的蓝牙系列在应用层,可以用BlueSuite3,当前安装的是BlueSuite 3.2.2 ,可以cd C:\Program Files (x86)\QTIL\BlueSuite 3.2.2 运用CMD 命令
cd C:\Program Files (x86)\QTIL\BlueSuite 3.2.2
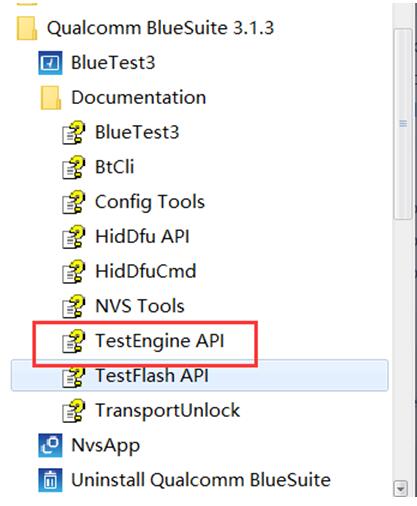
如果量产的话需要运用BlueSuite 库来写量产工具,可以参阅BlueSuite 安装路径下的文档,此处用TestEngine 的库运用C语言程序来修改设备信息
1、开发环境设置
开发环境:C++(Microsoft Visual Studio)
头文件:TestEngine.h
库文件:TestEngine.lib
运行环境:Windows 系统,TestEngine.dll 相关DLL,为了使得工具能够运行,可以把TestEngine.dll 相关DLL所在文件夹路径:C:\Program Files (x86)\QTIL\BlueSuite 3.2.1,设置成Path环境变量,这样工具程序就可以动态调用DLL相关库运行了。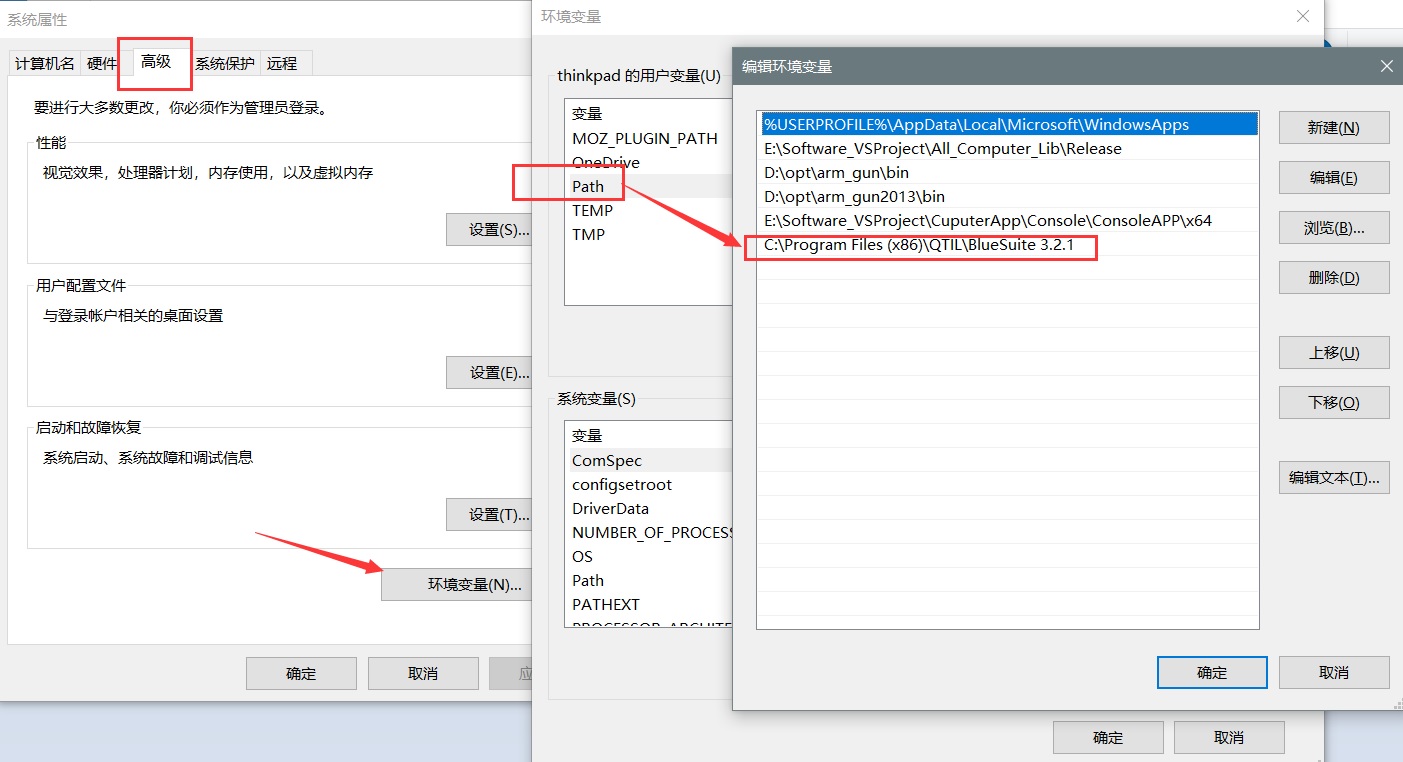
2、开发流程
打开Microsoft Visual Studio 集成开发环境,新建à Win32-> console application,输入Project名BT_Info_Mag,选择console application—>Empty project->Finish 确认。
添加BT_Info_Mag_PSK.cpp,代码如下:
//BT_Info_Mag_PSK.cpp
#include "include\\testengine.h"
#include
#include
using namespace std;
//定义的pskey 在ADK 中 #define PoweroffReasonKey 200
#define PSKEXTENSION ((0x2000))
#define PSKCUSTB (PSKEXTENSION + 2000)
#define PSKEY_CUSTOMER0 (PSKCUSTB+0)
static const char* const CFG_DB_PARAM = "hyd.sdb:QCC512X_CONFIG";
int main(int argc, char** argv){
uint32 iHandle = 0;
cout << "Trying to connect..." << endl;
//iHandle = openTestEngine(TRB, "1", 0, 5000, 0);
iHandle = openTestEngine(USBDBG, "1", 0, 5000, 0);
if(iHandle != 0)
{
cout << "Connected!" << endl;
// Perform all your testing here
// Initialise the configuration cache
int32 success = teConfigCacheInit(iHandle, CFG_DB_PARAM);
// Read the configuration into the cache from the device
uint16 unused = 0;
if (success == TE_OK) {
success = teConfigCacheRead(iHandle, NULL, unused);
}
else {
cout << "teConfigCacheRead failed!" << endl;
}
// Write Bluetooth PSK
uint16 data0[2]={0,1};
uint16 data[2];
uint16 maxLen = 2;//KEY_READ_BUFFER_LEN;
success = tePsWrite(iHandle, PSKEY_CUSTOMER0,maxLen, data0);
if (success == TE_OK) {
std::cout << "data[0] = " << data0[0] << std::endl
<< "data[1] = " << data0[1] << std::endl
<<"Write successful"<< std::endl;
}
success = tePsRead(iHandle, PSKEY_CUSTOMER0,maxLen, data, &maxLen);
if (success == TE_OK)
{
std::cout << "data[0] = " << data[0] << std::endl
<< "data[1] = " << data[1] << std::endl
<<"Read successful"<< std::endl;
}
closeTestEngine(iHandle);
}
else
{
cout << "Failed to connect" << endl;
}
getch();
}
然后把TestEngine.lib 添加进来,就可以编译通过
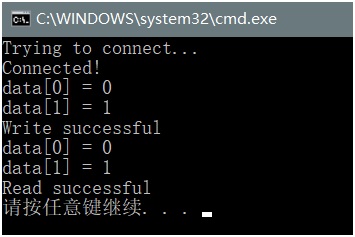
3、运行结果
QCC512x 与QCC302X 系列的板子,通过 TRBI200/USB连上PC, 运行应用工具,
蓝牙PSKey修改成功,并且读出来了