

Today, everybody talks about Artificial Intelligence (AI). It is growing rapidly and its market is on fire.
With the support of Intel® Distribution of OpenVINO™ toolkit, you can easily get started with AI.
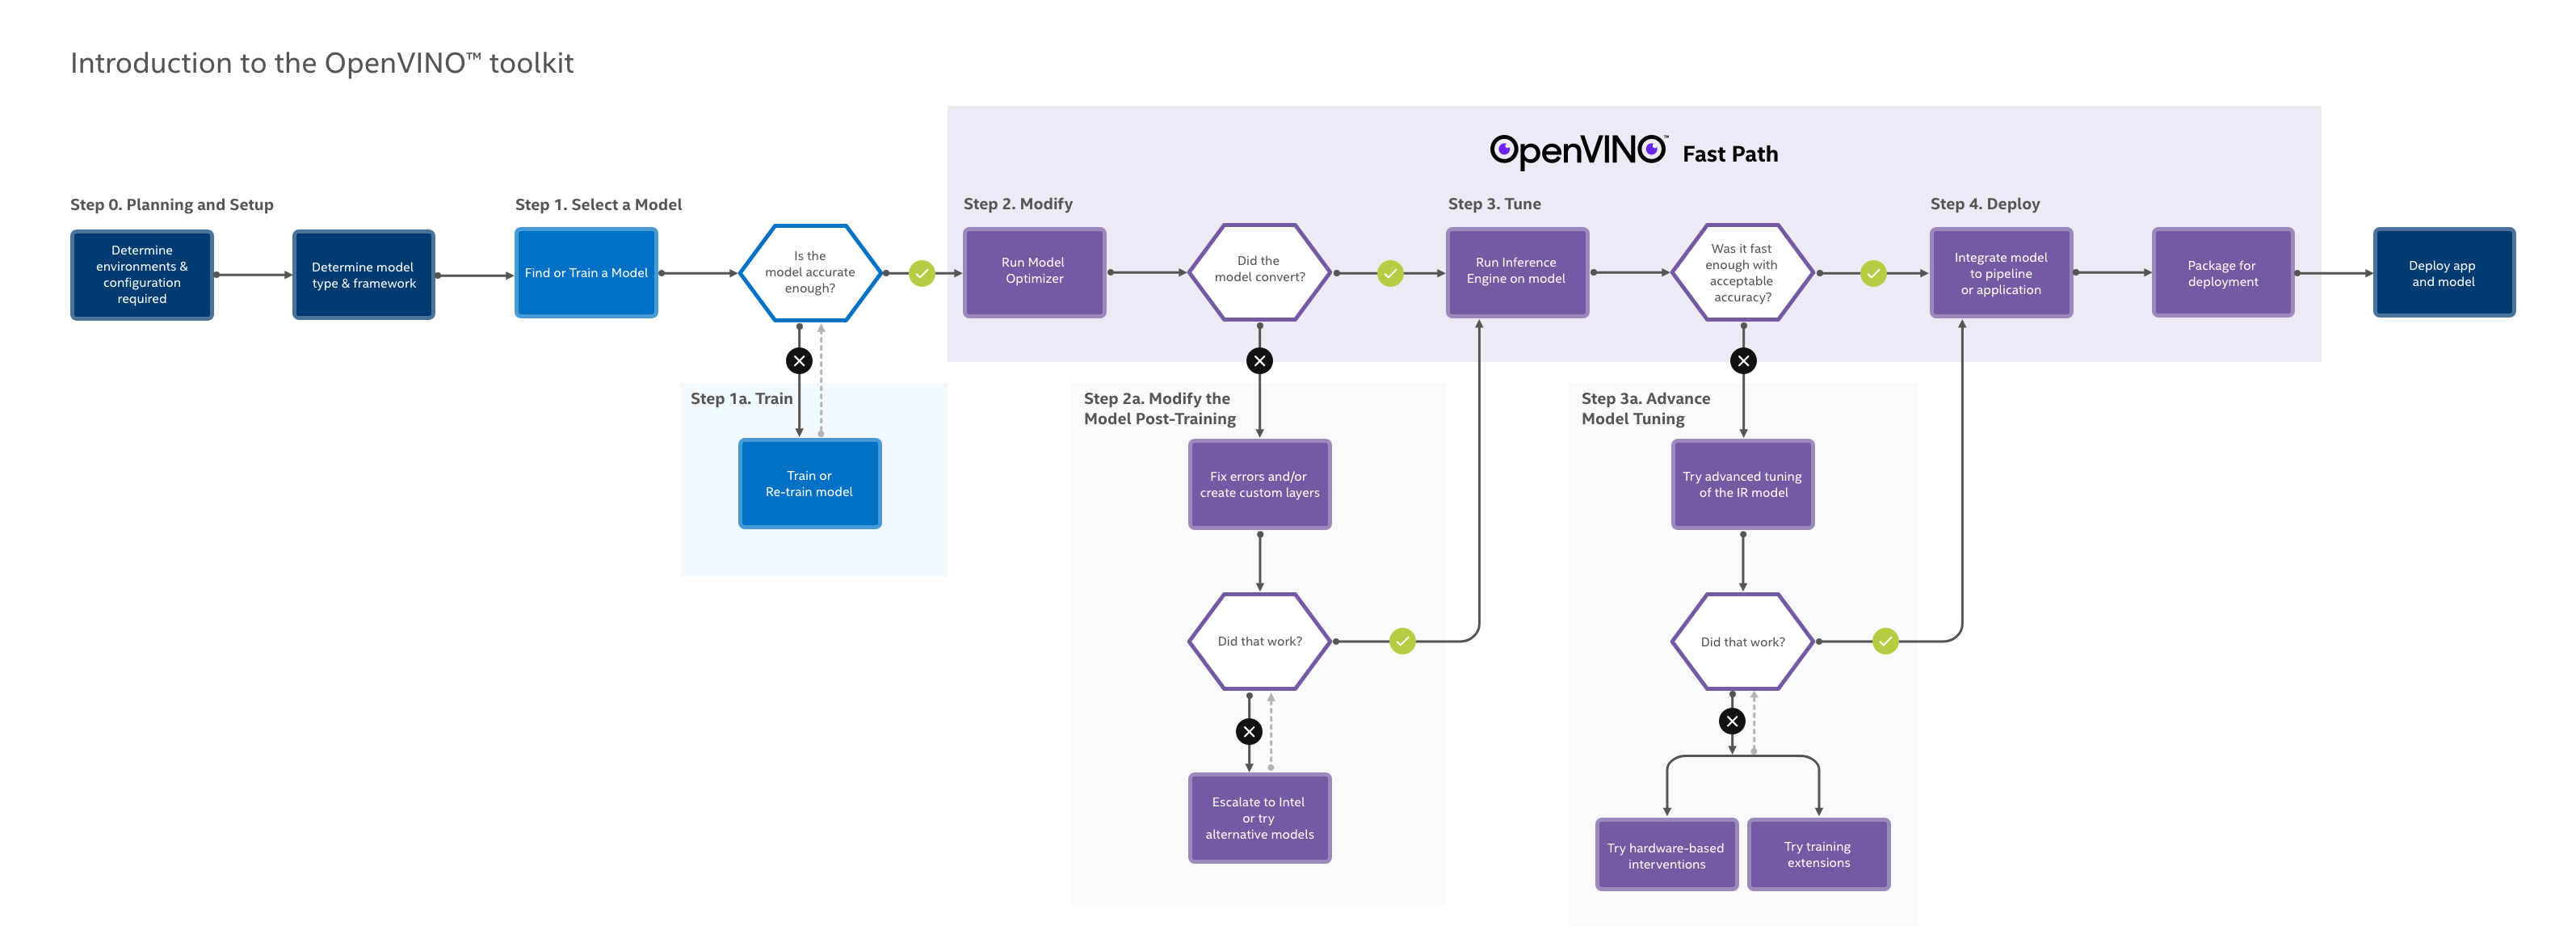
Let's quickly recall what OpenVINO is.
To get the OpenVINO, navigate to this link.
The installation guide for Linux can be referred to here.
OK. Then what is YOLO?

You only look once (YOLO) is a state-of-the-art, real-time object detection system. Using YOLO algorithm, you can locate the object interested with a bounding box and a corresponding class label. It is one of the most effective way to boost your computer vision projects. Check out this link for more information in detail.
Prerequisites: To build the Demo Applications on Linux*
Go to the directory with the
With the support of Intel® Distribution of OpenVINO™ toolkit, you can easily get started with AI.
Let's quickly recall what OpenVINO is.
- What exactly is OpenVINO?
OpenVINO stands for Open Visual Inferencing and Neural network Optimization.
- What are the usages of OpenVINO?
The usages of OpenVINO are really endless. From adding visual identification capabilities to a surveillance camera, to a retail store system, in a manufacturing industry, in a cross road to automate the smart city.
- OpenVINO is mainly focused on deep-learning inference.
- What are the supported OS for OpenVINO?
Linux, Windows, macOS, and RaspbianOS.
To get the OpenVINO, navigate to this link.
The installation guide for Linux can be referred to here.
OK. Then what is YOLO?
You only look once (YOLO) is a state-of-the-art, real-time object detection system. Using YOLO algorithm, you can locate the object interested with a bounding box and a corresponding class label. It is one of the most effective way to boost your computer vision projects. Check out this link for more information in detail.
Now that we review the OpenVINO and YOLO, let's further dive into the practice.
Software Requirements:
| Target OS: | Ubuntu* 18.04 LTS |
| OpenVINO: | 2020.3 LTS |
Prerequisites: To build the Demo Applications on Linux*
Go to the directory with the
build_demos.sh script and run it:cd /opt/intel/openvino/deployment_tools/open_model_zoo/demos/
./build_demos.sh
# Step 1: Clone the repo to your workspace
Switch to that folder
cd tensorflow-yolo-v3
Download coco.names file from the DarkNet website
wget https://github.com/pjreddie/darknet/blob/master/data/coco.names
Download the yolov3.weights
Run the converter
python3 convert_weights_pb.py --class_names coco.names --data_format NHWC --weights_file yolov3.weights
# Step 2: Converting YOLO v3 model to Intermediate Representation (IR).
You can revisit OpenVINO Documentation to check the way to configure the model optimizer.
python3 /opt/intel/openvino_2020.3.194/deployment_tools/model_optimizer/mo_tf.py --input_model frozen_darknet_yolov3_model.pb --tensorflow_use_custom_operations_config /opt/intel/openvino_2020.3.194/deployment_tools/model_optimizer/extensions/front/tf/yolo_v3.json --batch 1
We shall be able to see the following outputs on the console, if successful
[ SUCCESS ] Generated IR version 10 model.
[ SUCCESS ] XML file: /home/openvino/tensorflow-yolo-v3/./frozen_darknet_yolov3_model.xml
[ SUCCESS ] BIN file: /home/openvino/tensorflow-yolo-v3/./frozen_darknet_yolov3_model.bin
[ SUCCESS ] Total execution time: 32.02 seconds.
[ SUCCESS ] Memory consumed: 1729 MB.
# Step 3: Perform YOLO v3 object detection test.
Copy and rename the label file in accordance with converted IR files
cp coco.names frozen_darknet_yolov3_model.label
Running the demo
cd ~/omz_demos_build/intel64/Release/
./object_detection_demo_yolov3_async -m ~/tensorflow-yolo-v3/frozen_darknet_yolov3_model.xml -i ~/path_to_input_stream
Result: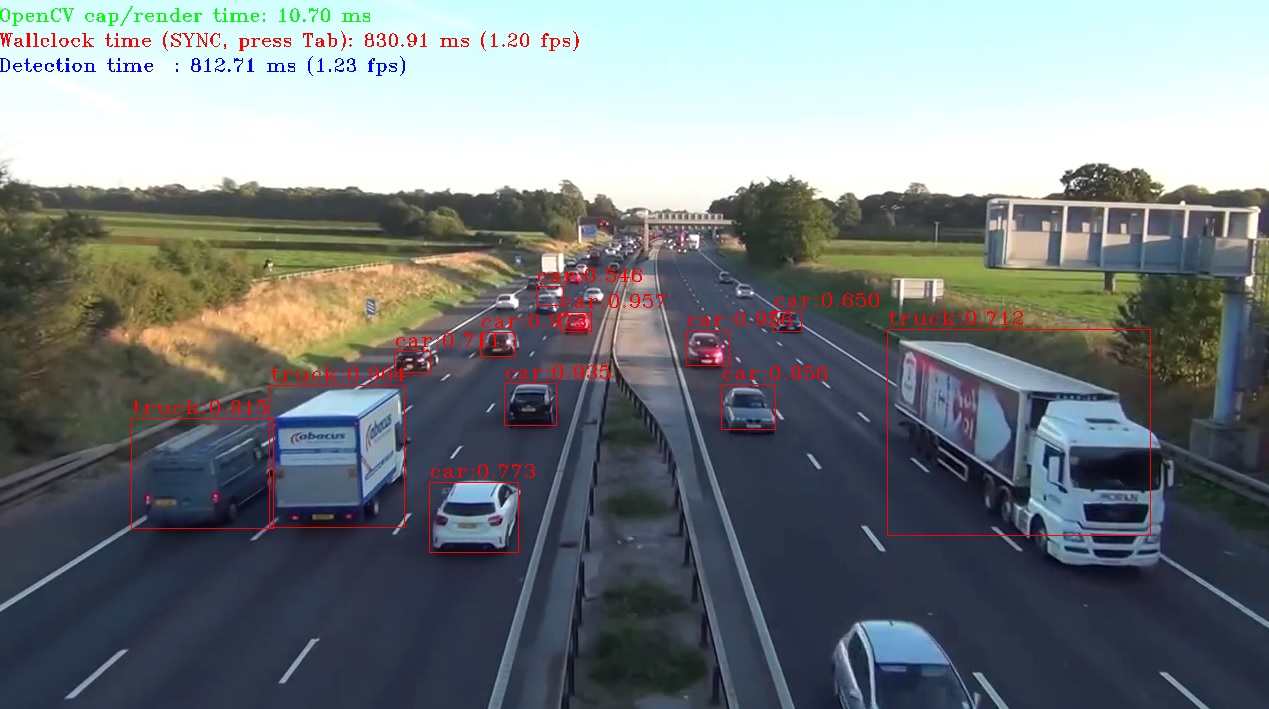
Reference:
1. API Performance Showcase of Object Detection YOLO* V3
2. Converting YOLO* Models to the Intermediate Representation (IR)
評論