

這篇就教你怎麼把它改成Digital Mic
1. 參考在C:/qtil/ADK_QCC512x_QCC302x_WIN_6.3.0.154/doc/subsystem_config/audio_qcc512x_qcc302x.html裡面的DigMic0PioConfig設定
DigMic0PioConfig
|
Number (psid) |
0x00a2 |
162 |
|
Type |
octet_string |
|
|
Default |
DigMic0PioConfig = [ff ff] |
|
|
Allowed Values |
||
|
Minimum string length |
2 octets |
|
|
Maximum string length |
2 octets |
|
|
PIO configuration for first Digital Mic instance This key defines how pins for first Digital Mic instance (instance 0) are configured. The octet string key value contains a value each for the CLK_OUT & DATA_IN signal lines in that order. Each signal can be specified to use 0x00 - 0x5F: PIO number or If the signal is not required, it should be set to 0xFF: Unused If multiple digital mic instances share the same clock pin, set the CLK_OUT signal on any one of the instances to the required PIO number and set it to Unused on all the other instances. All digital mic channels that share a clock in this way must be placed in a sync group. Also, digital mic endpoints on the instance that defines CLK_OUT should be connected first for the clock to be enabled. |
||
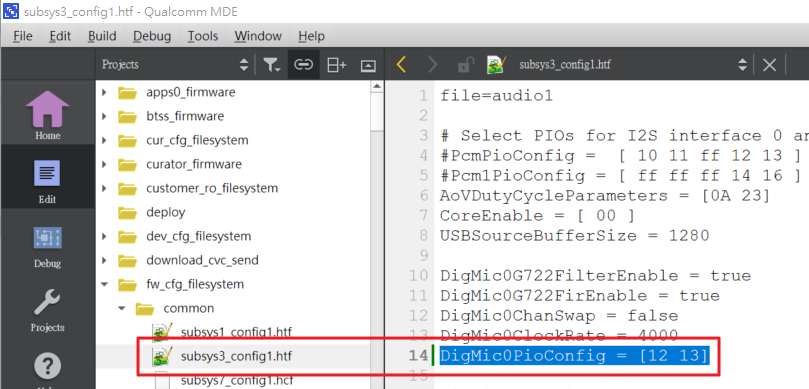
2. 假設我們選擇PIO-18, PIO-19當作CLK和DATA,在subsys3_config1.htf設定如下
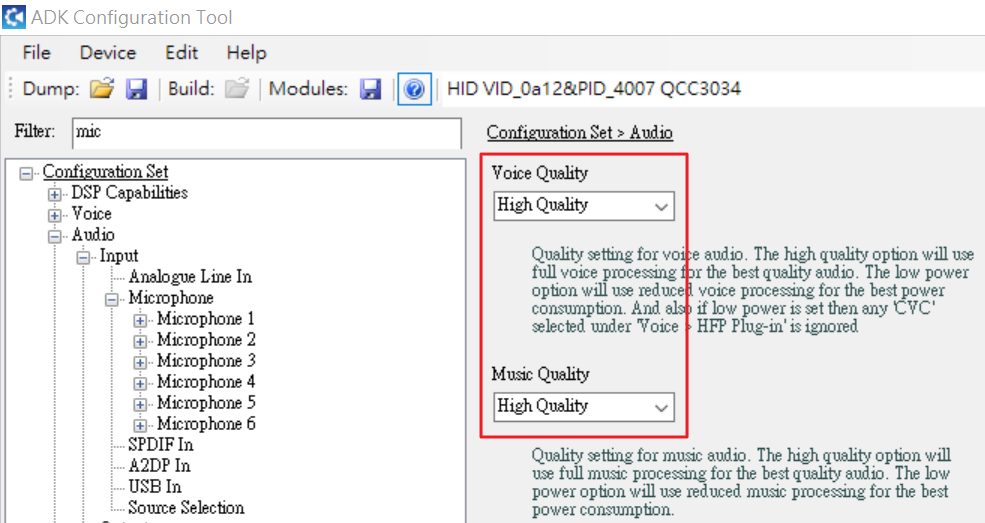
2. 在ADK Configuration Tool裡面設定Voice Quality和Music Quality為High Quality
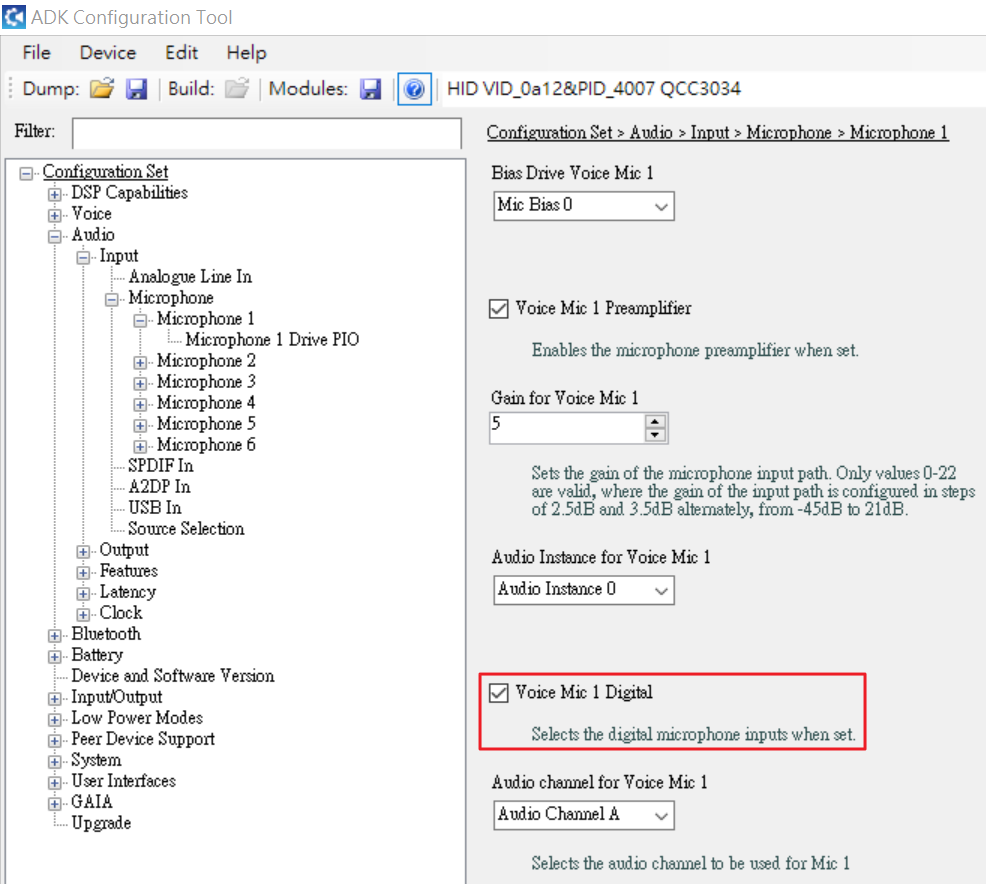
3. 勾選Voice Mic 1 Digital
4. 如果要調整Mic gain,可以透過QACT在此調整

以上就大功告成了
評論
EthanChu
2022年3月21日