

 一、Introduction介紹
本文主旨在說明如何架設 RSL10 開發環境,RSL10 提供兩種開發環境 eclipse 及 Keil u Vision MDK-Arm,本文主要介紹 Eclipse-base with RSL10 SDK 環境,軟體端透過 CMSIS-Pack 提供 sample code 及更新而不需要重新安裝 IDE。
二、Prerequisites 環境需求 Java Runtime Environment (JRE)
64-bit variant of the most recent Java version, choosing the Java Runtime Environment (JRE).
URL:https://java.com/zh_TW/download/ 
URL: https://www.segger.com/downloads/jlink

The RSL10 SDK allows for rapid development of ultra-low power Bluetooth Low Energy applications. Convenient abstraction decouples user application code from system code, allowing for simple modular code design. Features such as FOTA (Firmware Over the Air) can easily be added to any application. Advanced debugging features such as support for SEGGER® RTT help developers monitor and debug code.
URL:https://www.onsemi.cn/PowerSolutions/product.do?id=RSL10 
Cortex Microcontroller Software Interface Standard (SMSIS) enables consistent device support and simple software interfaces to the processor and its peripherals, simplifying software reuse, reducing the learning curve for microcontroller developers, and reducing the time to market for new devices.
ON Semiconductor provide two CMSIS-pack for RSL10.
RSL10 SDK CMSIS Pack for Eclipse and Keil for peripheral(UART, I2C, SPI, etc…)
Bluetooth IoT Development Kit CMSIS Pack for Bluetooth sample code
URL: https://www.onsemi.com/PowerSolutions/supportDoc.do?type=software&rpn=RSL10
三、Connecting The Hardware 硬體配置
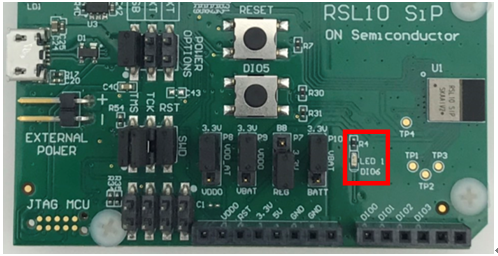
- 確認 CURRENT 有連接 ,POWER OPTIONS 選擇 USB ,其餘配置如下圖所示。
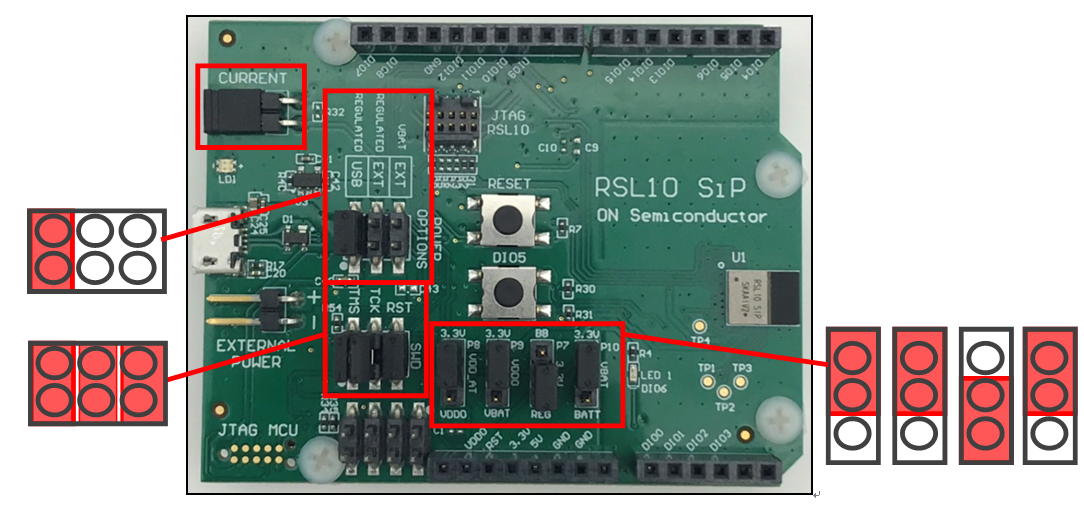
2.一旦配置正確 ,將開發板透過 micro USB 連接至電腦供電 ,靠近 USB 接點的 LD1 在第一次供電時 LED 閃爍後轉為恆亮狀態代表開發板狀態正常。
四、Install IDE 安裝 IDE

- 安裝前如果之前有安裝舊版 RSL10 SDK 請先移除並將 RSL10 資料夾刪除。
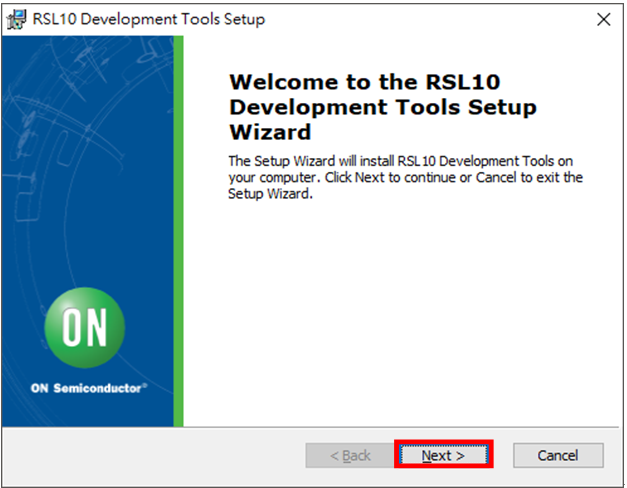
- 點擊 MSI 檔案開始安裝 ,點選 Next。
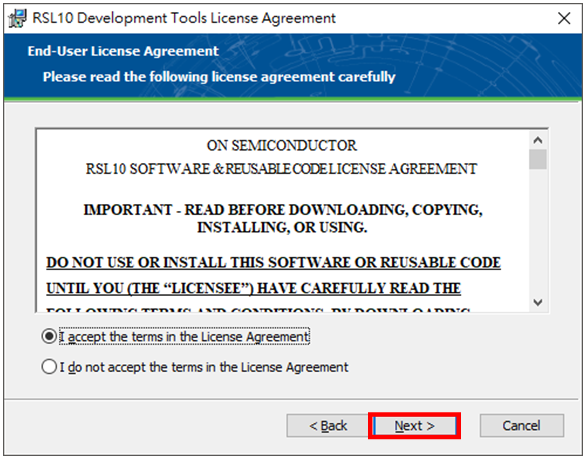
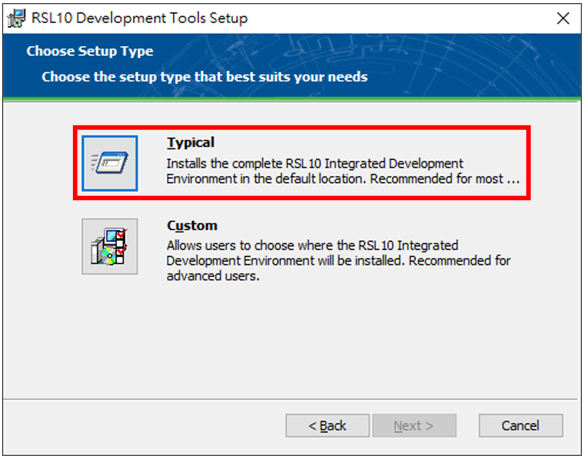
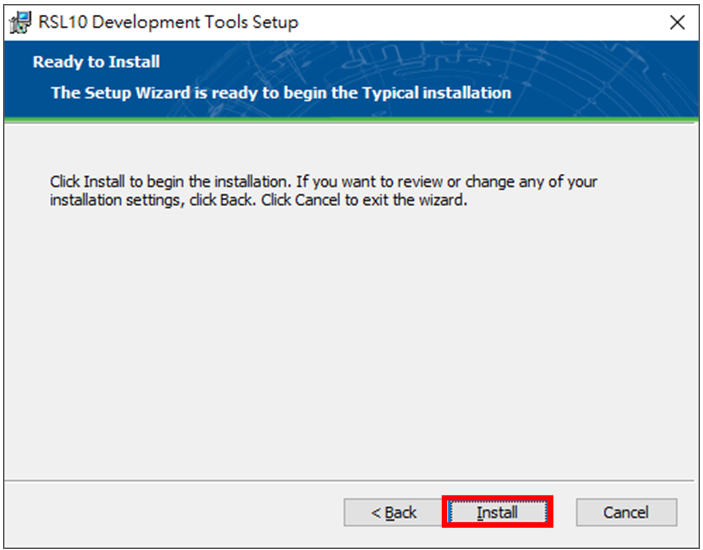
- 點選 Typical 後點選 Next。
- 下載 BDK.1.5.1.PACK 及 ONSEMICONDUCTOR.RSL10.2.4.1

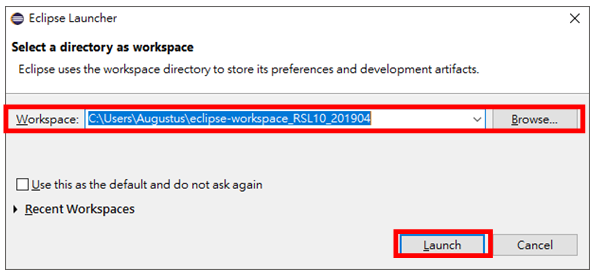
- 開啟 RSL10 SDK ,選擇要放專案的資料夾位置。
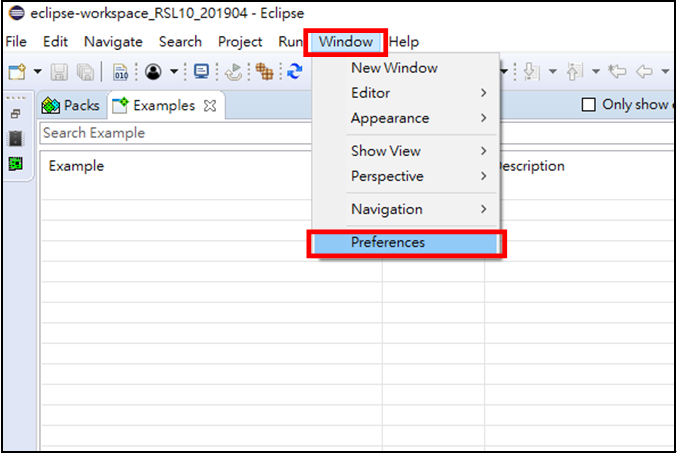
- 當 IDE 開啟後點選 Window--> Preferences。
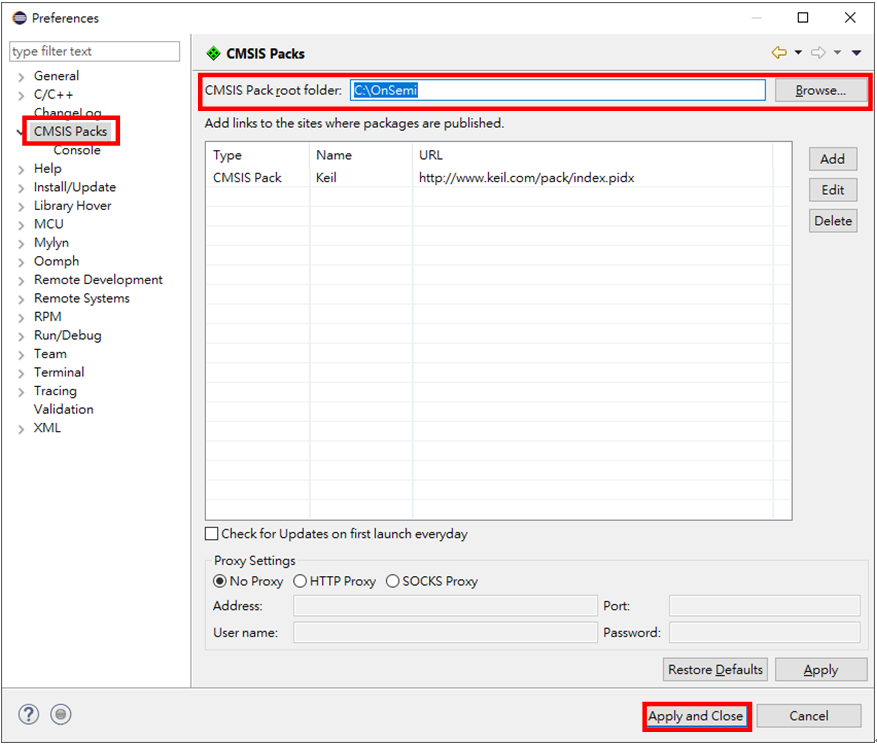
- 在 Preferences 視窗左側中點選 CMSIS Packs ,在 CMSIS Pack root folder 中選擇你要安裝 CMSIS-Packs 的位置,如 C:\OnSemi ,選擇完畢後 點選 Apply and Close。
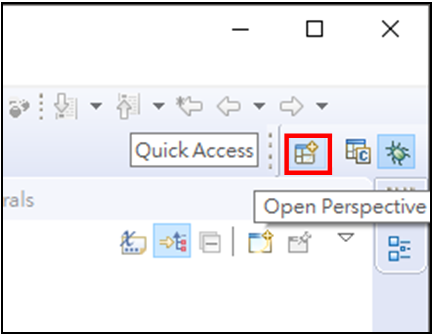
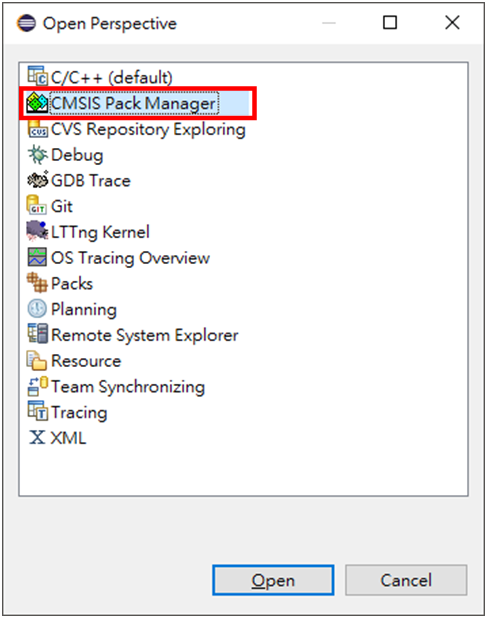
- 點選右上角Open Perspective 圖案後點選 CMSIS Pack Manager 。
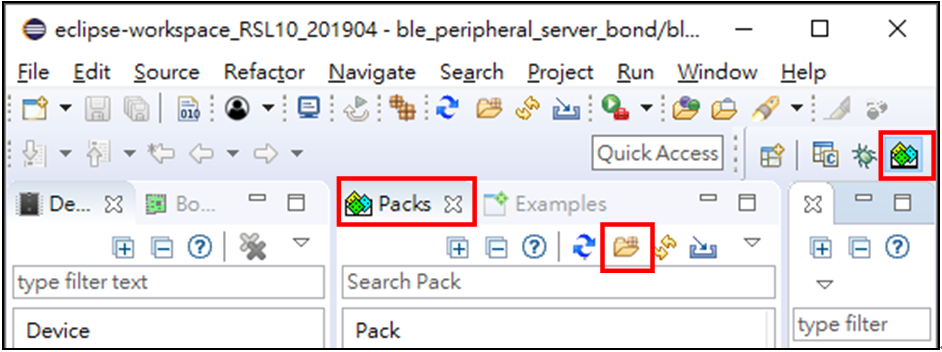
- 在 CMSIS pack manager 中的分頁 packs 點選 Import Pack。
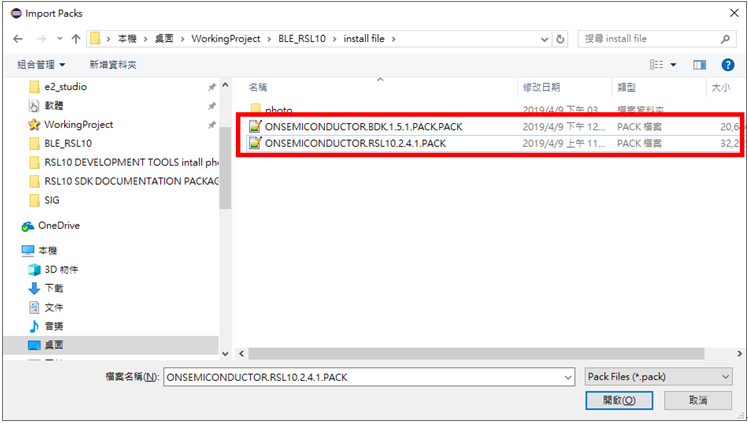
- 點選要安裝的的 CMSIS-Pack ,重複前述步驟安裝 BDK.1.5.1.PACK 及 ONSEMICONDUCTOR.RSL10.2.4.1。
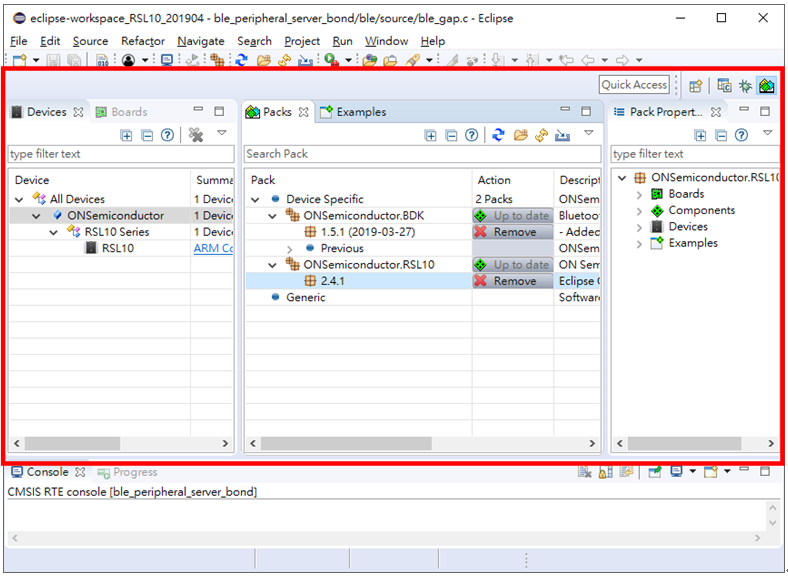
- RSL10 CMSIS-Pack 至目前為止已安裝置 IDE 中 ,在 Devices 分頁中你可以展開所有 Devices > ONSemiconductor > RSL10 Series 中 RSL10 清單 ,你可以在 Packs 分頁中管理你安裝的 Packs。
五、Building Your First Sample Application in Eclipse
在此步驟中我們要點亮開發板上的 LED (DIO6) 透過 ON Semiconductor Example 快速確認環境安裝正確及了解 example 載入步驟。
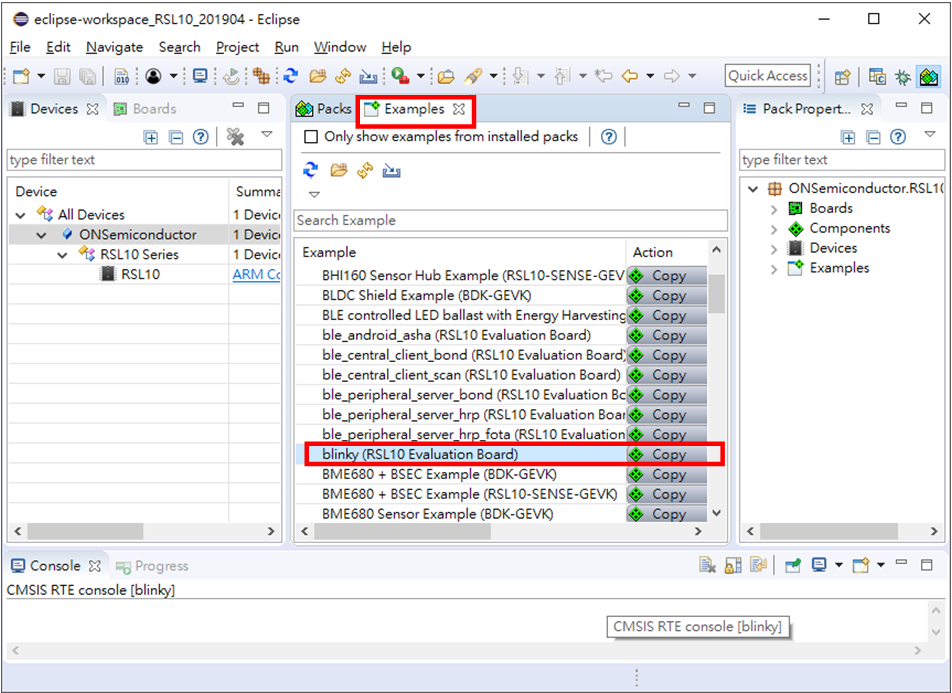
- 在 CMSIS-Packs Manager 中點選 Examples 分頁 ,根據安裝的 CMSIS-Pack ,此分頁提供 Example project ,使用者可根據自己需求載入 example ,在此步驟點選 blinky ,點選 copy 後即載入至 IDE 中。
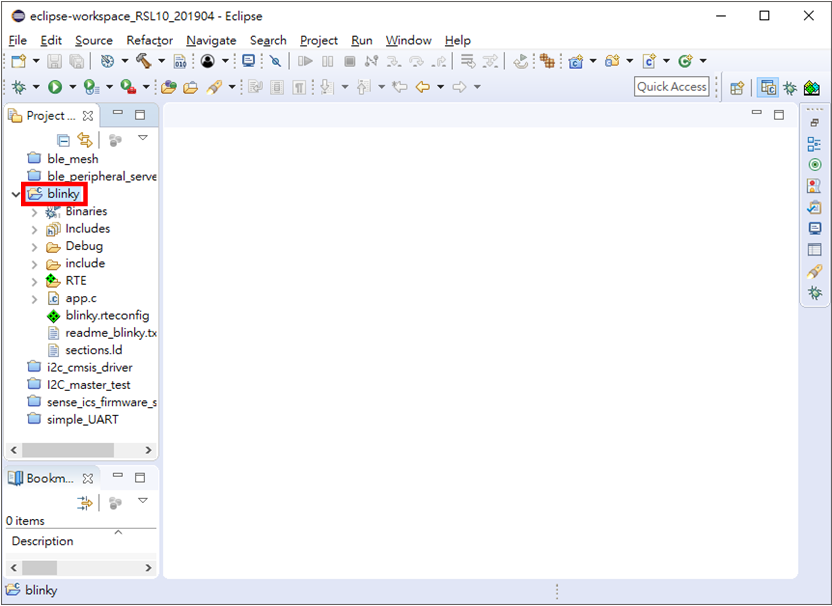
- 回到 C/C++ 視窗,在 Project Explorer 中可看到剛剛載入的 blinky。
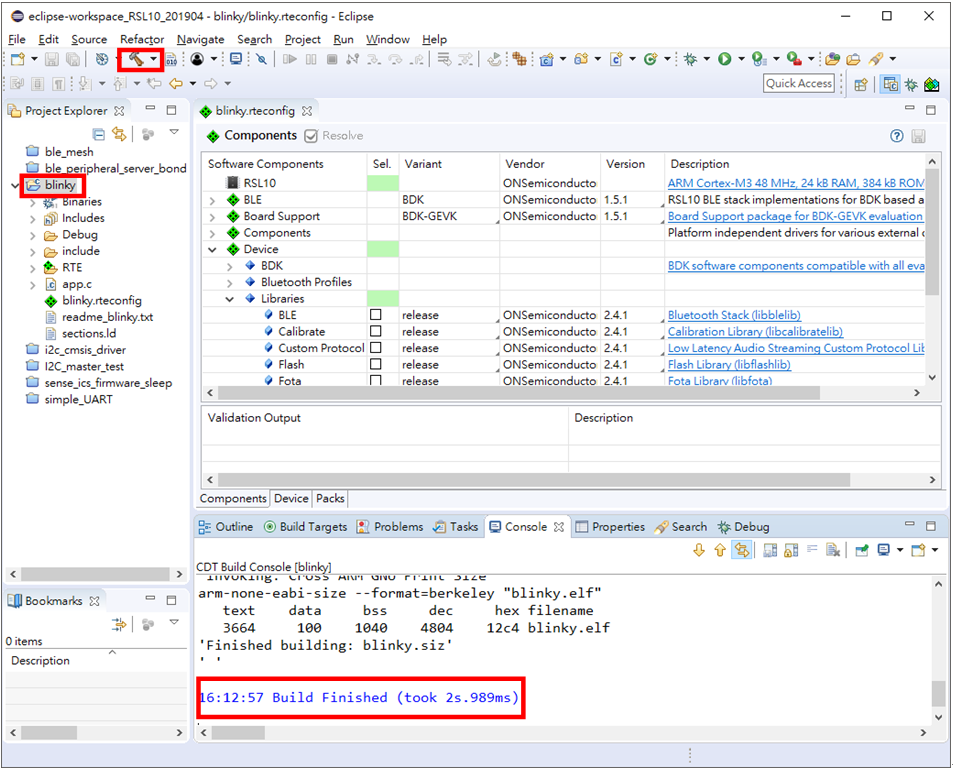
- 點選 Build Project ,則開始執行 build 程序 ,執行結果會在 Console 顯示 ,當顯示 Build Finish 時代表專案無問題。
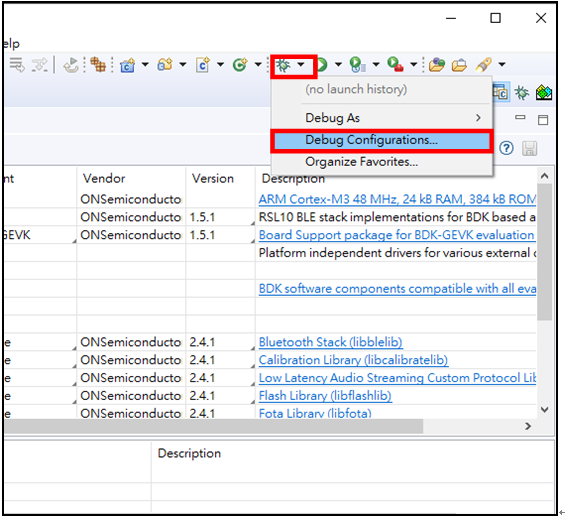
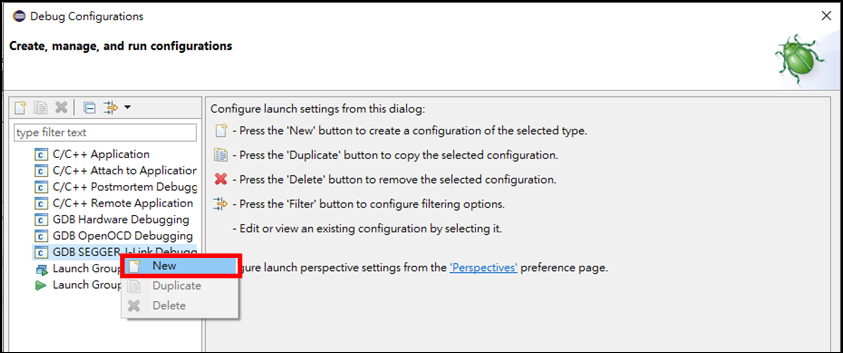
- 點選 debug à Debug Configurations。
- 在 Debug Configuration 視窗中點選 GDB SEGGER J-Link Debugging 右鍵 --> New。
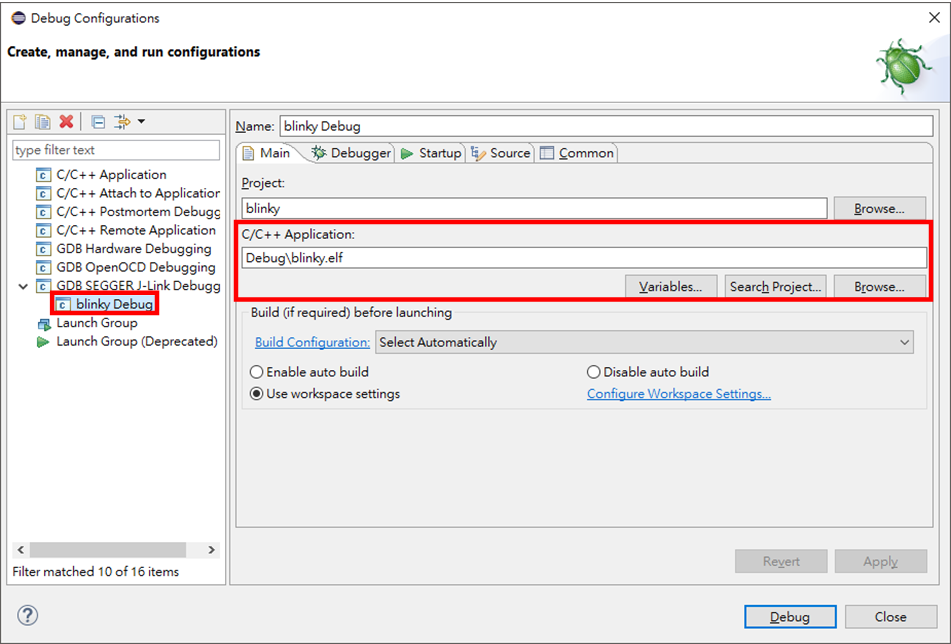
- 確認 Main 分頁中 C/C++ Application 是專案 blinky 所透過 build 產出的 elf 檔案。
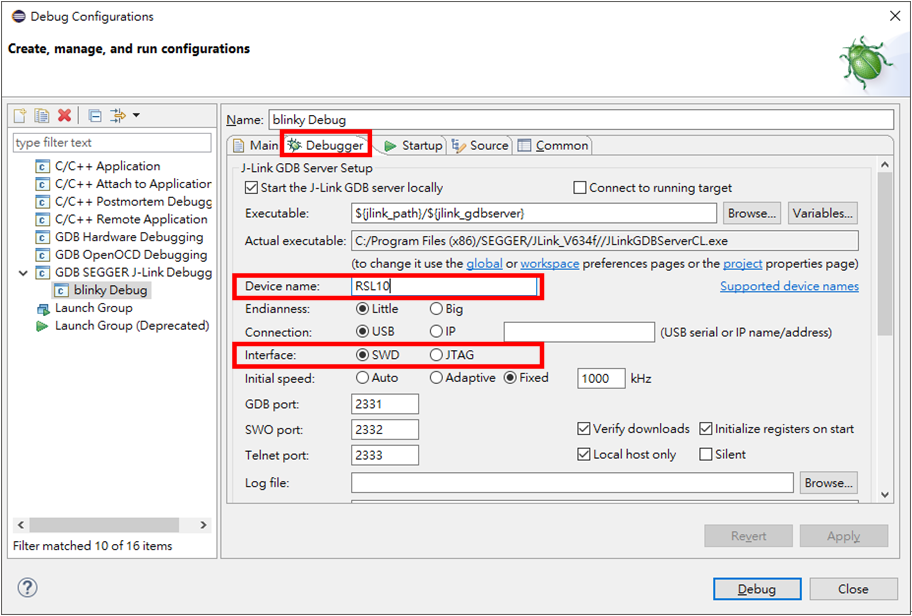
- 切換到 Debugger 在 Device name 欄確認為 RSL10 ,在 Interface 選項中為 SWD ,確認無誤後點選 debug。
- IDE 會導向 Debugger 模式並暫停在 main 起始位置上 ,點選 Resume 按鈕開始執行 Example project。
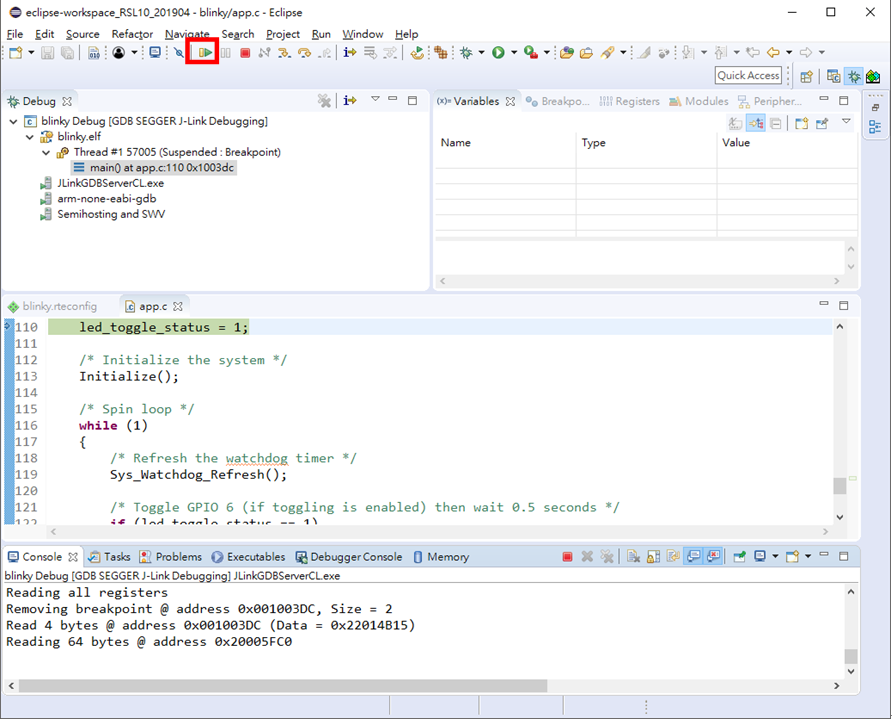
- 此時開發板上 LED1 會開始進行閃爍。
六、EmbSysReg
RSL10 IDE 提供 EmbSysReg 插件 ,可供在 Debug 時暫存器清單介面並可透過手動操作暫存器進行 Debug。
- 在 RSL10 IDE 中點選 Window à Preferences。

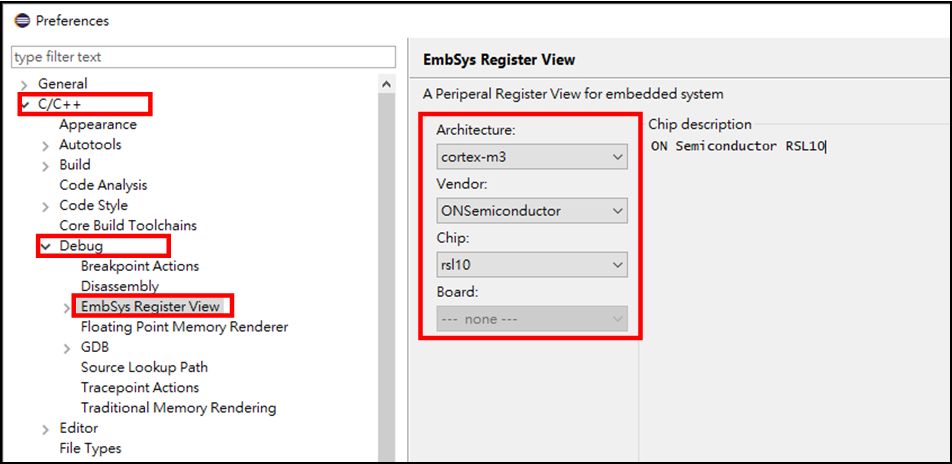
- 點選 C/C++ à Debug à EmbSys Register View 確認參數設定如下圖所示,參數無誤擇點選 OK關閉視窗。
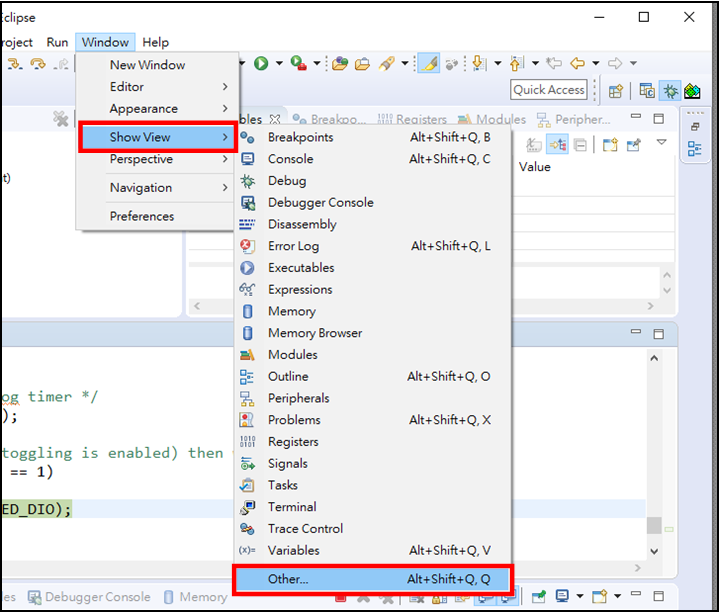
- 在 Debug 視窗下 ,點選 Window --> Show View -->Other...
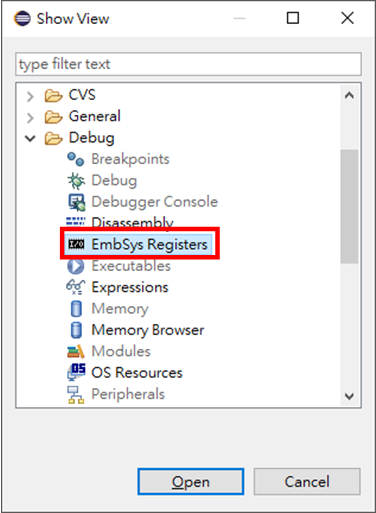
- 在 Debug 底下 ,點選 EmbSys Registers 後點選 Open。
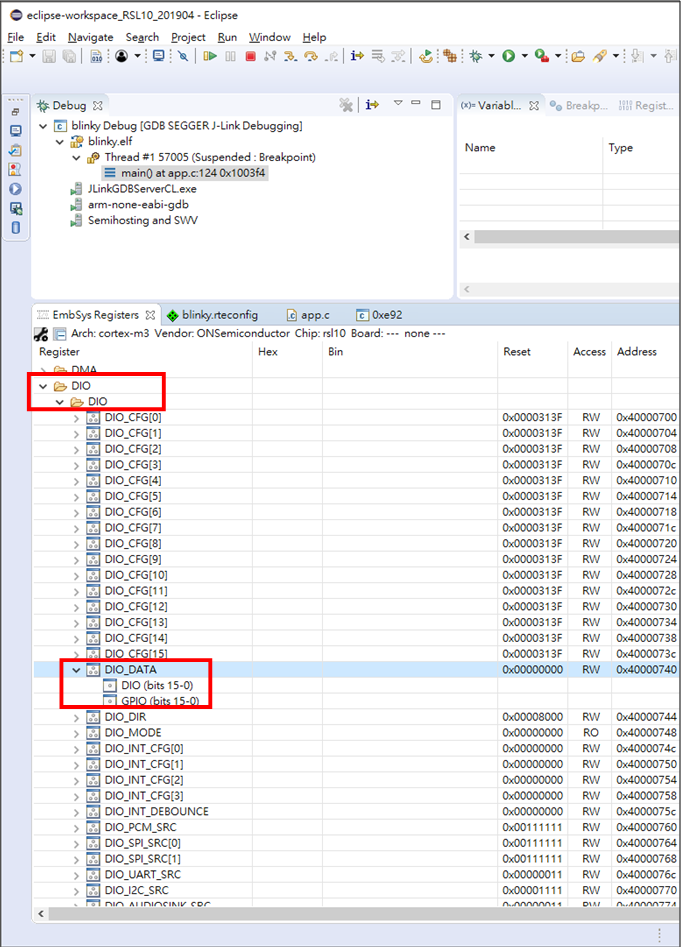
- 在 Debug 視窗下可看到 EmbSys Registers視窗 ,展開 DIOà DIO à DIO_DATA,並雙擊點選 DIO_DATA。
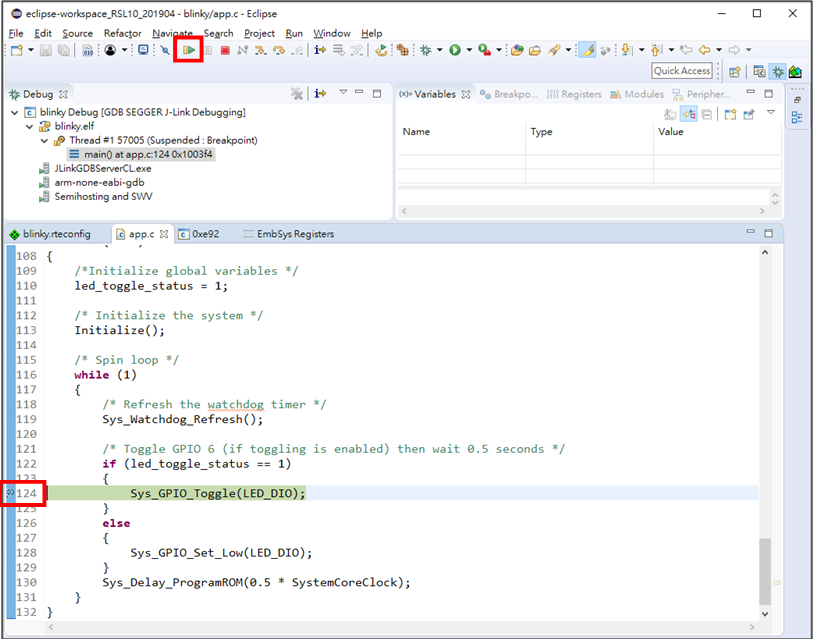
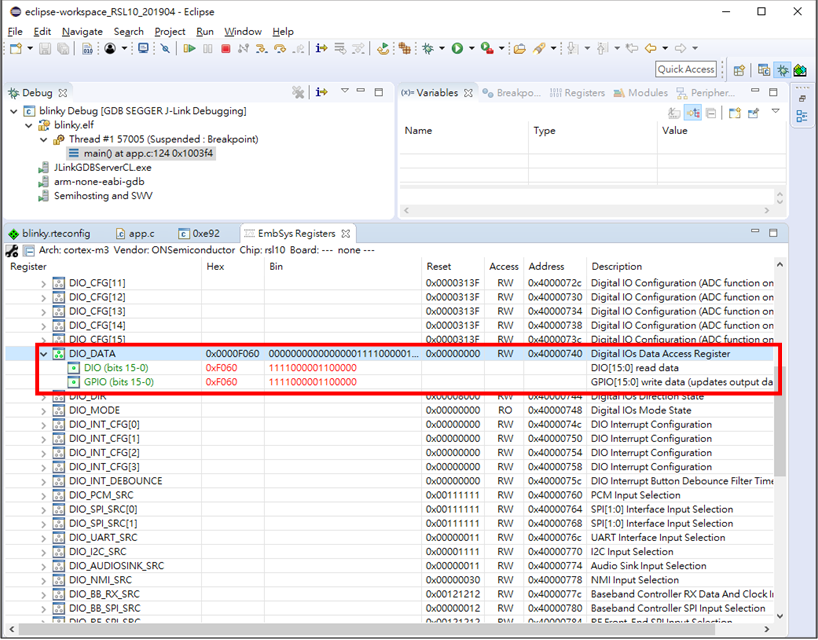
- 在程式中第 124 行插入中斷點後 ,點選 Resume ,當程式再度停在中斷點時即可發現當執行後 DIO_DATA 有變化。
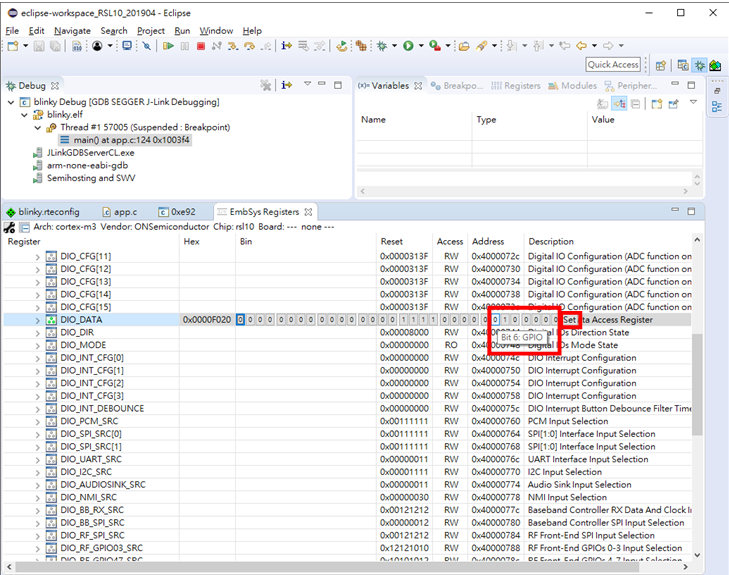
- 點選 DIO_DATA 的 Bin 欄 ,選擇 Bit6 GPIO 將其改變後點選 Set ,此時 LED 狀態應該會改變。
評論